

Leaderboard
.thumb.jpg.060d370ad0226da8b37ee8dd6f706e09.jpg)

Popular Content
Showing most liked content since 08/19/2018 in Posts
-
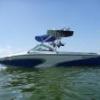
7 pointsNo August or September Pic and Video thread...? Shame on you guys! I just whipped together an edit from my ride last week and wanted to share it with y'all! I know I've been away from here for quite some time, but I still love the Crew! Hope everyone had a great summer!
-
6 pointsPost up pictures of your finished boat garage!I built my 24ft boat a new detached garage when I built my new home recently. I fully insulated and installed a wall unit so I could heat/cool the space. Its done a great job, only thing I did not realize when I bought it was that the lowest heat setting is 61 degrees and there are times when it would be nice to set it too 50 degrees. But its been very efficient since I was careful to insulate well and use a LOT of spray foam and I cannot complain. Moved in Sept 2018....and FINALLY just got the garage set up like I had been planning, just need to properly organize all my tools and boat stuff now. When I designed the garage, I wanted to be able to maximize the space since the boat is roughly 27ft long on the trailer with the tongue folded and swim platform on (I use it to get into boat) and about 9.5ft wide from fender to fender on width. The garage is 32ft long X 16ft wide with 12x12 garage door (ceiling of garage is 13' tall). Since it has 2x6 walls, inside comes to basically 31ft long X 15ft wide.I wanted to be able to bring the boat home from a day on the lake, and from inside the boat, remove everything if I wanted to without having to climb in/out of the boat. Same for loading up, so I can choose what surf boards, kids toys, etc.....that we want on the lake that day without getting out. I usually remove the seats to make sure the boat dries out and I never get any mildew or wet smell....so I built 3 wood racks on the side for the seat, and 2) 4x8 metal racks that hang down from the ceiling 42". This allows me to reach all the main things for the boat by either standing on the gunnels (I installed decking on gunnels for grip), or standing on the rear walk-thru transom. Then I also added as many metal shelving units at rear that I could (have 3 installed so far) those are for tools, boat supplies, oil change equip and all the other fun stuff....and am putting a "Gladiator" wall system up to hang things like rakes, shovels and other misc. On left wall, I still have 8 of those to install which will finish filling up that wall.I got this all done while boat was at the shop over the last 2 weeks...brought her home last night and backed her in for the first time and am pretty happy with how things turned out, everything fits perfectly, tho just barely in some areas. I planned to epoxy the garage floor in the Spring and think that I will put down something (maybe a colored line in the paint), so when I back in, I know to keep my tire on the line since I only have roughly 6" on each side of wiggle room to keep boat where I want it so I still have access to walk down either side of the boat since there will still be some things on the floor. I need to install some kind of "tire stop" as well so I can keep the depth correct.
-
5 pointsWe put together a series of videos on how to best optimize the surf wave on your Centurion boat. The videos are broken down into Wakesurfing 101, 201 and 301. Here are some details on each video: Setting Up Your Wakesurf Wave 101 – This video is for when you are first getting started and goes through the basics of how to create a great surf wave that anyone will be able to jump on and enjoy. Setting Up Your Wakesurf Wave 201 – Once you have the basics down this video will help you take it to the next level. In the 201 video we show you how you can use all of the features on your Centurion boat to customize the surf wave based on the rider size, rider skill level, board they are riding on and more. If you are ready to take your wave from great to amazing this video will help you do that. Setting Up Your Wakesurf Wave 301 – In this video we go the extra step to show you how the professional riders and drivers set their boats up. This gets to a level of customization and intensity that is more than a lot of people want to get into but if you want to see how we set things up for pro riders, check this one out! We hope these videos will be helpful and that you can use them to get the most out of your boat. Happy Surfing!
-
5 pointsWhat’s up everyone, so it’s been quite a while since I first got my boat and started this old thread but I thought I would just give a little update. Ended up getting the Aviator tower and went a little crazy with the stereo among many many other projects on it haha. I will say that I am very appreciative of this site as there has been a ton of content that I researched and read through that really helped me out along the way!
-
4 pointsBrought the Fi home today. We did purchase it from Pat and his crew at Northwest Boat Sports in Oregon City. Very attentive hard working team. They are all ready to step up to help their customers. Ian took us for a demo to show how to set it up for wakesurfing awesomeness. Brian was great helping with the details. It has been a pleasure to do business with them. Looks like we might have light wind tomorrow so hopefully will get on the water. Picked up a new Soulcraft with the boat so ready to step up our game. All the best, Hein & Kim
-
4 pointsWe are bringing our Fi25 home on Tuesday. I'll be happy to answer questions as we get to know it. All the best, Hein
-
4 pointsBeen wanting to build some wall racks for my surf boards for about a year, and now that I have a dedicated boat garage I finally got around to making them. Designed it to hold 5 boards. I put together the surf board supports 2 separate nights (top 3 the first night and bottom 2 the second night). It evolved a bit the 2nd night and I am going to revise the top ones to match the bottom sets since it looks a lot cleaner and the racks did not need to be so long. First few I did at 30" long, mostly cause I bough 60" pieces of 1" PVC and just cut them in half, I did the others @ 24" and also did end differently and they turned out a lot better. Pretty simple design, used 2x4 as the base and drilled 3/4" holes into it and used a 45 degree PVC angle fitting on the 1" PVC pipe and then glued/screwed them into 2x4 to hold them in place securely. PVC is then covered in foam pipe insulation and I also put some strips of adhesive foam insulation over the face of the 2x4's to protect the boards since they rest against it due to how I did the angle. I have 13ft ceiling in the boat garage, and placed the wall rack high enough so after I back the boat into garage after surfing, I can just put the boards back into the racks from inside of the boat without having to climb in/out with them. Anyway, figured I would share the pics, I know I like looking at pics when others post DIY stuff, I have gotten a lot of ideas from seeing stuff like that. Just broke out the wet suits, supposed to be in the 20's next week, usually we ride till Thanksgiving just been raining a lot lately in this area making it kindof dreary.
-
3 pointsWe brought home our 2019 Fi25 last week and had our first session the day after. I consider myself lucky to score a session on a new toy the day after I get it. It doesn't always work out that way. One result of that quickness to rally kept me from having the opportunity to mount the rear view mirror which came with the boat. That proved to be a challenge as we tried adjust the surf settings without really being able to see the wave change. I am not a fan of mirrors clamped on the windshield anyway and wanted to try a rear view camera instead. That is the upgrade that this first post is about. We purchased a rear view camera and display on Amazon a few days before picking up the boat from NWBS in Oregon City. https://amzn.to/2DEgZTg I spent some time figuring out how and where to mount the display above the OEM dash in good view of the driver without blocking the view in front of the boat. Scratched my head a bit, took some patterns, did some CAD work and machined some parts shown below next to the display for the camera. Figured out where to place the camera on the back of the boat. Wire was run along the right side under the seats. Then continued to fit the CNC'd mounts to the dash. Happy these were a perfect fit right off the bat. This step usually requires some iteration of CAD tweaks and CNCing of more parts until the fit is right. A bit of skill and luck this time around. Used some 3M VHB to attach the mounts to the back of the display. This camera is designed with some straps that normally wrap around a rear view mirror. I trimmed those off and removed the pads that rest against the mirror surface. That is were my brackets attach to the back with the VHB. Then I mounted the camera on the dash. I will add some VHB between the mounts and dash to hold it in place. This was just a test fit to verify the position. Here is the view from the driver seat. Back of barn and CNC machine are shown in the image. We will have to see if this is angled right when on the water but think it looks pretty good. Note that the display is actually upside down. The camera is designed to be mounted above a license plate on the underside of the cover that normally is above them. Having the display upside down actually improved the wire routing which I still need to clean up a bit. So this all worked out for the better. This camera also has a built in front view cam which can 'see' through' the windshield but we won't be using that feature. It can record and do a host of other things which may be fun to try. We can actually record our sessions on a thumb drive so that might be cool. It's 1080P so resolution will be pretty good. Will post some videos when we get a chance to test it out. All the best, Hein
-
3 pointsIt Shipped this morning! Should be here Saturday. Here are a few pics that the salesman send today.
-
3 pointsA woofer change will not address this, as the current enclosure is the biggest factor in how the woofer sounds. You would need to change the enclosure volume. If the woofer is whats making all the unwanted noise, then you need to first determine if any external factor was the root case, before installing a new woofer.
-
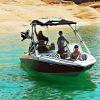
3 points2020 Ri257 (w/LSX). Canadian Blue Sparkle and White. Interior is standard white, hex black, hex deep bronze. I'm not swooned by the bombshell racks, so I have a set of PTM Edge wide-mouth clamp racks I'm trying to figure out how to get the right brackets to get mounted. Sorry for the kids tubing pic, its' one of the few I have with the interior. Our adults crew is 95% wakesurf.. and we hope to get the kids into it too. (my kids are only 6 and 8 y/o)
-
3 pointsThanks guys! Glad I could help Josh! Yeah, that’s what I seen/read Mob. I don’t do FB though. When it first started I told my wife “that’s the devil and I will never have an account”. Haha! at this point I’m kinda committed to that take! Haha! We can’t wait to get that ZS out on the water and get back to surfing!
-
3 pointsQuick followup.. I went with the Ri257 (with the LSX) -- in all honesty because the Ri is more of a known quantity for me. I've spent 30+ hours on two different Ri257s, and I love the boat. It also became obvious from BoardCo answers that having the same hull means the boats are so similar it comes down to preferences. I was able to finally see an Fi23 in person, and overall I like the calmer RI styling and slightly higher freeboard for big Lake Tahoe, so that's the way I went. We took delivery two days ago.. and we couldn't be happier. Picture below. @BoardCo - Thanks so much for all your help answering questions on here, and posting awesome youtube videos of Centurions on the water! They really made a large purchase decision much easier. Your answer above helped me shed the FOMO of not having the Fi ski-pylon. @Duneit - We bought from https://www.mellomarine.com/ in Folsom, CA. Sally and Brandy have been fantastic to work with. Sally (the owner) negotiated the COVID-modified Tahoe boat inspection restrictions for us to get it in the water asap, and has been great.
-
3 pointsNew gas new filter drained can could not get can all the way off big black hose in the way of dropping down far enough so I just sucked out the gas in can and put back together fired right up and ran with no codes so thank you for your help
-
3 pointsFinally did mine but went with the Angled Starboard and Port side specific LED's.
-
3 pointsI just had to replace my steering cable on my 05 SV230 and figured I’d add a few things that might be helpful. First, as I understand it, Teleflex no longer exists and was replaced by SeaStar so the new part number is SSCX15420. I ordered from Fredwarner.net and it cost $150 w/free shipping. I followed a lot of the guidance from above, but just to add a little more, I had to remove both water hoses from the back of the water pump to make accessing everything easier. Just unscrew the hose clamps and they pull off. I didn’t need to remove the water pump or sideswipe and was able to reach the cotter pin on the pitman arm fairly easy, and I’m on the husky side. The hardest part was getting the threaded nut on the steering cable unscrewed from the shaft housing that’s held in place by the clamp with the 4 bolts. I used an adjustable wrench but I THINK it’s about a 1 ¼” nut if you have a wrench that big. You could always take the new cable to a hardware store and find the right size wrench since the nuts are the same size. The shaft housing would turn with the nut when I would try to loosen the nut, but not as much as the nut, so it eventually came off but was a tedious process. I sprayed PB Blaster on the threads but I’m not sure if that even made a difference, perhaps some vice grips would help if you could fit them in there. Once I got that unscrewed, I pulled the cable/shaft out of the housing and then tied a rope to the end of the shaft where the retaining bolt would normally be. Before I could pull the cable out from the helm, I had to remove the paneling underneath the dash on the floorboard to access the hole where the cable comes out. The cable/nut got hung up on the gas tank, so I removed the floor panel to get access to the cable. This was well worth the few extra minutes, plus it made it easier to pull the new cable back through. I also agree that it’s much better to buy a new cotter pin; I tried the old one to no avail, but a new one went in on the first try. It’s definitely helpful to have a second person to lend a hand but is possible to do yourself. All together from start to finish, it took me about 3hrs which includes re-installing the under dash paneling and floor panel along with centering the steering wheel and rudder.
-
3 pointsHi again, all. Thought I'd post a quick update. We took the boat out about a week ago for a test run. Prior to heading out, I poured in two bottles of HEET to help absorb any water or bad gas. At the lake, we had the same problems with acceleration. It idles fine, goes okay at low speed, but dies out when going for higher speeds. We ended up getting it started and were able to drive slowly back and load it on the trailer. A couple nights later, I took off the old water separating fuel filter and poured the contents into a glass jar to see if there was water choking out the fuel system. There was no sign of water, sediment, particles, or anything. So as far as I can tell, there's no water in the fuel. (Glad to know that the filter is working well, tho.) When I went to O'reilly Auto this morning to pick up another Sierra Water Separating Fuel Filter (they can order them and have them in about a day for about $2 more than Amazon), I talked to one of the guys there. His brother used to have a Ski Nautique and Moomba, so he knows the engines and layout a bit. He said that since there's no problem with the actual fuel (from what I could see), the problem has to be in fuel delivery - most likely the fuel pump. He said that if the fuel pump diaphragm is cracked, it could have enough pressure to delivery the fuel at lower speeds. It wouldn't sputter or anything, but appear to be fine at lower speeds. But upon acceleration, when the diaphragm is working harder to deliver fuel to the engine, it won't be able to keep up, and the engine would end up stalling out. He said on trucks with the Chevy 350 small block engine, if there's a problem with the fuel pump (cracked diaphragm or whatever), the excess fuel gets squirted out of the pump as you drive, and it ends up on the ground or somewhere else on the pump housing where it can evaporate. But you can't do that on a lake, so the gas ends up being sent to the crankcase and mixes with the oil. So he said to pull the dipstick, wipe it on a clean paper towel, dip again, wipe again, and then smell. If it smells of gas, then it's probably a bad fuel pump. So I came home, followed the steps and..... It smells a heck of a lot like there's gas mixed in with my oil! I had just changed the oil in our 4Runner (full synthetic, but should have a similar smell to regular used oil), and I smelled both of them separately. The oil from the boat DEFINITELY smells of gas. So the next step is going to be to put on a new fuel pump, new water separating fuel filter, change the oil... and then at some point, I'll get the steering cable (got it from Ron today) and the bilge pump done, too. Thanks for helping out, @Timr71 and @InfinitySurf. I'll keep everyone in the loop as I move forward. I feel like I'm finally on the right path!
-
3 pointsI did it! Got a really good deal on the new one and the trade-in. Can't wait to get it in the water. Thanks for the responses!
-
3 pointsNewbie to the page! 1994 Ski Centurion LaPoint Tru Trac. PCM 351 Pro-Tec. The Cadillac of ski boats 26 years ago.
-
3 pointsJust picked this up, works quite well. I can grab my drink or put it down without taking my eyes off the lake ahead. Heavy enough it doesn’t move around even over most waves. Called the beverage bandit.
-
3 pointsA few things here: The Fi25 and Ri257 ride almost identically in rough water - you will be VERY happy with either one. The Ri257 has a tow point above the swim platform that is ideal for tubes. You can ski from this point but from my experience, the tower is a better spot. As far as this goes, it is one of the common misconceptions I run into when talking to people about skiing. People consider it near blasphemy to talk about water skiing from the tower, but for 90% of people who ski it is actually a better tow point than a pylon. It allows recreational skiers to get up easier and reduces overall drag once they are up. The benefit of having a lower tow point really only matters if you are pulling HARD through the wake and honestly if you are pulling hard enough to justify going to a pylon you aren't going to want to ski behind a Fi25 / Ri257 anyway. To give you some background I am a tournament skier, I own a Carbon Pro boat (along with a Ri257) and spend time in a buoy course regularly. When I ski behind a Fi25 or Ri257 I am barely impacted by skiing from the tower. This point causes me some frustration because for most people skiing from the tower is not just ok, but it is actually BETTER than skiing from a pylon, but when I suggest it I get weird looks like I don't know what I'm doing haha. Jack (one of our guys here) gets the same reactions and he can run into 34 off in a course (which if you aren't familiar is REALLY good). The Ri257 ski wake isn't quite as good as the Fi25, but they are close. Out of the box the Ri257 puts out a slightly better surf wave while the Fi25 has a slightly better ski wake. They have the same running surface and the only reason for the difference is the Ri257 is slightly heavier. That said, most people wouldn't be able to tell a difference between them as far as ski wake goes. As far as stereo control goes, you can have an automatic volume adjustment installed but you can save a lot of cost and actually get better functionality by installing an app on your phone called Volumatic. It is AWESOME and a lot better than the volume controls that are set to RPM in my opinion, plus it only sets you back about $10. The Supra SE550 has some great features and is a really nice boat. There are some nice features on Supra but for me there are at least 2 BIG things you will miss out on vs. a Centurion. The most important factor that can't be overcome with modifications is the rough water ride. If you are using the boat on Tahoe the water can get ugly fast and having a boat that won't beat you up or scare you going through 5-foot waves is a must in my book. The next one is the surf wave on the Centurion is a lot better out of the box. You can get the Supra to throw out a great wave, but if you do much research you will find that pretty much everyone is running 1,000 lbs. of lead to get it to surf on the level of a stock Fi25/Ri257. If you cruise around a lot that is a problem since you can't get rid of it. The other downside that is just speculation from me is that the ski wake on the Supra wouldn't be as good. Supra boats have a very stiff wakeboard wake and from my experience, that translates to a stiff ski wake. I haven't skied behind one, but I have heard the ski wake is actually worse than a Centurion just because of the wake shape. The best thing to do if you are looking at one is taking them both for a drive, the difference will become clear very quickly. Lastly, the H6 engine will work fine for you but you probably wouldn't be disappointed with the 550 (for 2020 it will be the new LSX engine). If you cruise around a bit the added power and reduced RPM on at cruising speed is really nice. As far as reliability goes, its a bit early to tell on the LSX but thus far they have had no problems at all and should be more reliable than the XR7 (550 Supercharger) was. The main benefit is similar power but the engine is naturally aspirated so longevity and reliability should be better. It's a new engine for the boat world but it has been bulletproof in cars for a while so we anticipate really good things. If there is anything we can do to help you out on the boat decision process at all let me know. Thanks!
-
3 pointsTook delivery of our ZS232 a couple weeks ago.
-
3 pointsWakedirt, in my experience, shapers don’t work well on a 226....the wave is really good listed....that being said, I went down the path of a GSA system. It’s pricy, but it’s worth the money......it does require at least 4K in ballast to throw a big wave.
-
3 pointsAlthough I didn’t build it, I get to keep my boat in it and can work on it during the winter in Vegas.
-
3 pointsOriginally we added on to the garage to be able to keep the boat at home, only down fall was had to put tower down to put it in the garage but, could stand it back up once in. This last year we finished up the new boat garage with a board walk. This is where she will live unless a hurricane is coming.
-
3 pointsThat’s awesome, glad I could help. Love to see these forums helping fellow boaters.
-
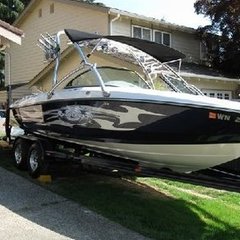
3 pointsMoved into my new home about a month ago and built a detached garage for my baby so she now has her own home. Most exciting part....I no longer have to fold the tower! Stays much cleaner now too being fully enclosed since before the front and back has ghetto tarps to keep out the rain, but did not keep out dust, etc. 32ft long X 16ft wide detached (also made entire roof truss system into a 12ft wide X 32ft long storage area). 14ft high ceilings with 12x12 garage door and at last minute, I decided to insulate, finish with drywall/paint....and installed a wall unit that has Heat & A/C. Got this picture yesterday when I came back from surfing. Bought a new Ram 1500 about 2 weeks ago too with 3.92 gears, 5.7 Hemi and the tow package, rated for 11,340lbs towing and 1840 payload (total 17,000 GVWR....so realistically 9k is the most you can "legally tow". Handles my SV244 with easy and is much better feeling than the Chevy I have been using for the last 2 years. Even tho the tow ratings are similar on both trucks, the Ram is more powerful and just handles better and brakes are WAY better when backing down a steeper ramp.
-
3 pointsRide it up. Thank you Belton Brosephers
-
3 pointsI think there’s more to this story than we are getting. There’s always 2 sides to a story.
-
2 pointsFrom what I have heard around here that hull with the back cut outs on the transom make it hard to get a good wave….
-
2 pointsUpdate: The block to add an Air Chair to the Maximus tower does not need a separate angle adapter and fits just fine. So far it has worked terrific.
-
2 pointsSo I am very happy with the mod. With the 15.5 inch prop, I gained 2 mph at top end. Dropped 400 rpm at surf speed and 24 mph cruise speed. Does 28 at old 24 mph rpms. Holds all ballast with no issues now for surfing. I was able to accelerate to 15 mph (upstream) with all ballast full with testing quicksurf (with the 14 inch prop I could not get above 9). At normal lean I was at 3100 rpm for surfing setup. So if you have enough adjustments in your engine mounts (room to go up in front and down in back) and enough clearance in the through hull, then this mod is 100% worth doing. I am very happy.
-
2 pointsThat's fantastic. I really like that the ladder in its down position is not completely vertical but at an incline. I will need to do this. When my in-laws clime up the platform, there is a sudden grunt, followed by a thud and sudden expulsion of air released somewhere behind me.
-
2 pointsI recently purchased a 4" seat riser from WakeBallast.com. Customer Service was impressive and delivery was very fast! (Just an FYI....they have a 15% discount code for Centurion guys, the code is "centurion-crew"). Listed price on the website is $269 with free shipping (then deduct the 15% discount). Obviously I am not affiliated with them, just impressed with everything about this seat riser and think this is gonna make an already enjoyable experience even better. I like to be aware at all times on the lake cause so many people out there that are not paying attention and have almost been run into several times over the years, so I always use my bolster so that I am looking over the windshield. Its not bad, but sitting on the bolster is not as comfortable as using the actual seat and I also thot this would make my wife happier. Considering she is willing to drive for me when we go out so I get to surf, making her happy and keeping her comfortable is a priority! Not only does the 4" seat riser raise the drivers seat to the perfect level for me without using the bolster...but a nice side perk I discovered today after installing it, is if I want to stand while driving, I can raise the bolster and while standing, comfortably lean back against the seat/bolster without the seat hitting me in the back of the knees and making it uncomfortable to stand for a while. I am attaching pics below of parts of my install as well as the finished product. The website says these 4" seat risers work for all the RI/FI models as well as 2013-2015 SV233/SV244 models with the Springfield Seat Mounts (My boat is a 2014 SV244 and has the Springfield seat mount). They also said on the FB page that this riser will fit the Supreme 238....but verify that as the website has a typo. Added bonus, this seat riser doubles as a strongbox. The front panel is keyed so you can put valuables in there and lock them up. FYI...these sell out FAST! They just got new stock in 5 days ago and have already sold 13. The website shows that there is only 1 left right now but if it shows them out of stock, Shane said to call them since sometimes they have them in stock and the website does not show it correctly. 2 things I personally did at the install. The 1st, I needed to do to complete the install....and the other was just my OCD kicking in. *I don't know if the hole pattern is slightly different on my boat compared to the new RI/FI boats, or if they are all slightly different due to these boats being handmade, but the 4 hole pre-drilled pattern at the bottom of the seat riser was a little bit off compared to the factory bolt holes, off roughly an 1/8th inch front to back....and then side to side. I just drilled the existing 4 holes at bottom of seat riser to a slightly larger diameter of 1/2" each (they came pre-driled at roughly 3/8" dia). Took me 15mins and once bolted down to the factory base, the riser was perfectly stable with zero movement. I also added a very thin piece of rubber backing between the top of the actual Seat platform that is part of the boat and the bottom of the seat riser where bolts go in.....and also at the top of the seat riser and the bottom of the metal seat base that is part of the Springfield seat mount. Not necessary, but figured it keeps the metal on the seat riser from rubbing directly on either one of them and keep it looking perfect that much longer, also figured that rubber helps to hold it down tight without any squeaks or rubs down the road. (To clarify, I added 2 - 3" wide strips at bottom/top of the seat riser). *I Included 1 picture showing the added strips of rubber, its the 6th picture attached below and you can see the grey colored strips adhered to the bottom of the metal seat base laying on the floor of boat (7th picture is close up showing the slight spacing that the padding adds between the top of the seat base and the bottom of the metal seat base). The rubber padding is only about 1/16" thick, adhesive on 1 side and a rubber "grid" pattern on the other. (Its actually sold to put on the floor of house in areas where you have a small rug and don't want it too move, sticks to the floor and the rubber helps to keep the rug in place). Something I had laying around and thot it would be useful for this install. Attaching link below as well as the pictures I took today as I installed this. https://www.wakeballast.com/centurion-boat-for-ri-and-fi-model-4-inches-seat-glove-box-riser-lift-free-shipping/
-
2 pointsMy Diacom software showed up. I installed it on a Windows 10 image in Parallels on my MacBook Pro. The software was able to read everything on my engine, and was able to clear my old O2 sensor codes. Other than the price, the software seems fairly good. It gave a histogram of how my engine has been run, the Amount of time At each RPM level, the octane of the fuel, etc. It also reads fuel flow while the engine is running. I plan to take it out this weekend and record some runs to see how the boat performs.
-
2 pointsif it doesn't have a dripless shaft seal, you should 100% install one first. the best thing to do is to keep water out of the boat, particularly the bilge where it can splash on everything.
-
2 pointsThis should be my final update in this thread. Both problems have been solved. For the steering, I followed @Timr71's suggestions and contacted Ron to get a new steering cable. Because there was also a bit of vertical play in the tilt steering assembly, I ended up replacing that, too. The new setup is solid as a rock, and it steers on a dime. For the loss of throttle, I followed @InfinitySurf's suggestions and followed the fuel. The carb looks okay. The water separating fuel filter was good. The culprit was the fuel pump. After putting the new fuel pump on and replacing the fuel filter with a new one, we took the boat out for a test. We were slowly driving along for a good bit at a slow speed. We turned back towards the ramp (so we'd at least be facing the right direction) and gave it some throttle. The boat responded and didn't let up. It was great! I kept waiting for the engine to die out on me, but it never did... it ran beautifully! MANY thanks to both Timr71 and InfinitySurf for your help! (InfinitySurf, checking the impeller is still on my list).
-
2 pointshey guys just picked this up the day after thanksgiving has 600 hours on the ol girl she is a 1987 trutrac? havnt seen this exact color scheme
-
2 pointsNice boat Hein! We just joined the Centurion and FI 25 family ourselves!
-
2 pointsFinally got the time to sit down and do a more detailed write up. Myself and a friend installed the SV version of these InfinityWave surf tabs on my 2014 Centurion SV244, we installed the tabs one evening and then I ran and finished the wiring a couple nights later on 04/13. Since the weather was crappy that weekend, my first LAKE TEST was on the evening of 04/17/2019. I can honestly say that my expectations were exceeded and after only 2-3mins, I had found the right deployment angle to make an excellent surf wave on the regular side. We only had a couple hours and myself and 2 buddies spent it surfing. I totally forgot to see what goofy wave looked like or get any pics or video without a surfer on the wave. I will do that next time out and post up more information. Initial reaction when getting the InfinityWave tab system….they look and feel very well made, its a beefy system and the finish is very nice. I love the fins on the bottom of the tabs since one thing that concerned me putting tabs on an SV244, is I knew that the factory Quicksurf tabs that were installed on the 2015/2016 models where not up to par and most owners I talked to or heard about preferred to still list the boat for the surf wave since they did not feel like the wave using the tabs had enough push/power. I believe with a deep V boat, the hull wants to direct the water outwards, not back toward the surf wave, so without the fins on the bottom of the tab which help direct the water coming off the bottom of the hull toward the surf wave, you don’t get surf wave that feels like it has power. I have Ramfill on my boat and since its important for the tabs to be up as far as possible under swim platform when retracted, the best position I found puts the actuator bracket mount behind the Ramfill tanks….so rather than run the actuator wire thru the hole in the bracket, I drilled/chamfered a hole for the wire approx. 3.5” toward the center of the boat & 3.5” higher than the bracket position so I could avoid the Ramfill tanks and get access to the wire. Actuator wire is 5/16” diameter, so I drilled a 3/8” hole (starting with smaller bit and running in reverse till well thru gelcoat), after the 3/8” hole was drilled I then got another drill bit slightly larger and ran it in reverse to chamfer the hole so I could avoid spider cracking and remove sharp edges due to wire running thru that (most people will not run into this and can run the wire thru the extra hole in the actuator bracket). Then I ran the wires thru hull and sealed the holes on both inside/outside of the hull. I then ran and zip tied all the electrical up to the bottom of the top deck along the outer perimeter and ran everything up to the drivers helm carefully concealing the wires and securing them with zip ties. For now, I am just fabricating a temp bracket to mount the switches below the steering wheel for easy access. My Ballast setup on this boat: Ramfill = 1,250 each side for total of 2500lbs. PnP bags in each rear locker at 700lbs each for total of 1400lbs. PnP bag under bow seats is 500lbs. Then I also have 500lbs of lead bags, I place 300lbs under the bow filler cushion and the other 200 lbs to the left of drivers feet on the floor against the built-in cooler. I fill the Ramfill tanks to 100% on both sides and then I DRAIN off the non-surf side Ramfill to 80% to give a slight list to boat. So basically 1250 Ramfill on surf side and 1000 Ramfill on non-surf side which gives a total of 4,650lbs of ballast. In video’s I posted links too above were taken on 04/17, total of 3 guys on boat including the surfer. Speed is 11mph and center trim tab is at 40%. PCM ZR409 engine at 800ft elevation and my rpm was at 3,150. Previously I ran the same ballast set up but used Nauticurl suck gate and with all things the same, my rpm was at 3,400, so using these InfinityWave surf tabs brought the rpm’s down for sure. Love that since its easier on the engine and I will save a little gas money to boot. Extremely happy with my purchase and wanted to post my experience since I know others are looking at these tabs and probably have similar initial hesitation like I did since these tabs are fairly new to market. Combine the performance of these tabs which I can now experience behind my boat with the great price and customer service and you have a winner!
-
2 pointsIt's great that you are happy with your tabs. I worked hard on the design with a lot of prototypes.
-
2 pointsCouple pics surfing the wave yesterday evening....more pics and details to come as soon as I have time to put it all together. Also gonna get pics/video of only the wave next time to show the shape/form. If you are on the fence about getting these surf tabs from InfinityWave @Shaka, its a no brainer at the price they are selling them for. Results could not be better in my opinion and I have high expectations when it comes to anything on my boat! Honestly, I was nervous about this initially since I knew the factory QS tabs where not too great on the 2015/2016 SV models. The shape of these tabs along with the fins under them to "direct" the water coming off bottom of the boat toward the wave to give you maximm push....works perfect and it seems that the lack of fins properly directing the water flow toward the surf wave was the flaw in the factory tabs. A deep-V hull is directing the water out, not at the wave and my best guess is that was why the factory tabs did not deliver results that owners were expecting and why many of the SV owners with the factory tabs list boat instead of using the tabs. These InfinityWave surf tabs certainly addressed tho issues.
-
2 pointsHere are some pics...
-
2 pointsSo i bought the avalanche.. Lots of research now for getting it set up a bit better :-)
-
2 points@InfinitySurf is correct on that one. For years Centurion did things differently (essentially we sold boats at MSRP) and we had A LOT of problems. People thought that we were hosing them and it took a long time to explain why we weren't giving them a $30k discount and the other dealer was. As far as integrity goes, a dealer should acknowledge that MSRP is an over-inflated number and if they don't you shouldn't trust them, hence my statements here on this forum. For lending, it would put any boat company that actually sells boats at full MSRP at a true disadvantage as most banks are only willing to finance 90% of MSRP max not including tax, freight, prep, registration, etc. That means people would effectively need to put 30% down to even qualify and upwards of 40% to get the best rate. We aren't trying to pull a fast one on the banks by any means, but if I have a choice between having a program that favors the bank's equity position vs. getting our customers the best possible rate I will go with the best rates for our customers.
-
2 pointsBoat builds in December. Ill take delivery early February then need to do the stereo instal
-
2 pointsLittle shout out to my slalom skiers.
-
2 pointsIMO, this is a good way to post something like this, calmly and without potentially burning bridges with a bunch of ranting. All brands have issues like this occasionally and since I frequent the forums and keep up on things, from what I have seen Centurion is certainly not the worst BUT there are always things like this that can happen with hand built boat since you have the human error factor. Seems like you are one of the unlucky ones that got a few things that should not have happened. I wont put names out there, but 1 of the "top brands" who sells the most boats, seems to have stuff come up pretty frequently. I will say that in my experience, Fineline has been very easy to work with on all warranty issues and always stepped up to the plate. I am sure you are talking to them about your options and hope they handle it properly. As far as your question...there is no doubt that stuff like that would cause doubt for anyone. Seems you got the 1 out of 1000 boat. The chances of it happening on next boat are pretty slim, but it CAN happen and can happen no matter what brand you choose. I have had great experiences with mine, hard to say what I would feel if I had been thru what you had, I would like to think that I would be open to another Centurion since its not something that happens often (as far as I know) and this is a "one off". Hopefully they will be taking these issues into consideration when making a deal on a new boat and making you a deal that takes all things into account. Good luck with a resolution
-
2 pointsPull 6 plugs on the engine/manifold to drain. Pull heater hose on one end of engine and blow to clear hose and radiator. Remove intake strainer and dump out water Pull v drive plug Turn on ballast pumps to ensure no water between ballast pump impeller veins Open and close QF valves to ensure no water Extra pooh: top off gas tank, pour appropriate stabil oil change oil filter change replace impeller every other year quick inspection of all hoses/wires/belt/lines
-
2 pointsSince we are back on the custom DIY ballast install topic I wanted to show a bit of what my install was about. So for a baseline my boat is a '03 Elite V Air Warrior with the factory center ballast only which uses a jabsco Water puppy to fill the hard tank under floor. My plan was to install a ballast system which would fill/empty on the move and would work equally as well for surfing as it does for wakeboarding. I wanted the majority of the ballast to be hidden but not take up ALL of my storage. The system consists of me adding 2 Launch Pad V-Drive Bags (from a previous boat, and will be upgraded to Flyhigh 750's) in the rear lockers and the Flyhigh wrap around bow bag in the front. At first I had the bow bag piggy backed onto the center ballast but that has since changed and is now on its own pump, thru-hull pickup and vents due to the slow fill and for more adjust-ability. I hoped to do like many others and keep track of every fitting, hose, clamp and pump but I have lost track after changing things here and there along the way. Parts - It started by ordering two Simer "Blue water" utility pumps from hardwareworld.com one for each Launch Pad in the rear lockers.Later I ordered one more for the bow bag. From boatownerswarehouse.com came the brass thru-hulls for the inlet/outlets, chrome thru-hulls for the vents and a number of pipe to hose adapters. From my local home depot the rest of the threaded pipe to barb hose adapters, ball valves, clamps, check valves and bulk hose was bought. Carling technologies dual throw / dual pole switches with lights were purchased on ebay. Switch covers to match my "Contura IV" factory switches were actually ordered from the dark side over at my local Mastercraft parts department. Finally the bow bag and flyhigh fittings were purchased on ebay as well. First thing was to make a rough diagram of the rear ballast setup. Here is the start to the parts for the install. First hole cut was the starboard locker vent. I put it in the factory location next to the bilge and center ballast vent. (3/4" chrome plastic 90 degree thru-hull) I replaced the factory black plastic for the chrome look thru-hulls. I cut a hole on the port side in the same location as the vents on the starboard side. Installing a chrome thru-hull. I choose to put the intake/output thru-hulls in the bottom of the boat so they were always underwater unlike the factory thru-hull on the stern. Here is the factory thru-hull for the center ballast tank. Yes I know it is VERY dirty. That has all been cleaned up. The previous owner kept the boat in the water and did not clean it very well, these pictures are from just after my purchase of it this spring. The thru-hull in the bottom on the hull were measured, mocked up, and cut just in front of the V-Drive. Again very dirty but there were some yellow marks showing my center of each hole, it was taped up and holes cut. Some silicone sealant put around the o-rings on the thru-hulls Both holes cut, thru-hulls in the holes, ball valves threaded into thru-hulls and hose attached. Under the dash I put fuses into the factory labeled holders, verified wire colors and then attached the powers and grounds from the fuse box to my switches. Wired up the switches and put them into the panel. I used 25 amp fuses as the Simer draw a higher amperage than the Johnson or Jabscos. ] The Simer Pumps are mounted in the front of the locker on the seat backs. Attached the hoses from the ball valves, and attached hoses then leading to the lower fittings on the bags. I ran the 10ft wires from the simer pumps up to the switches. Later I found the factory pump wiring in the Starboard locker tucked up under the edge so I used that and removed the extra wiring. Some of you will notice the giant rectangular holes the previous owner cut into the seat back for "bass ports" for the huge sub boxes he had in the lockers... I am building some covers to put over the pumps to protect them, and using those ports as vents with some slotted covers on the seat side. The poor boat was butchered by the audio install shop / last owner. I set the bags in the lockers, attached the vent line to the 5psi check valve (so the bags will go into a vacuum when emptying) and attached the check valve to the TOP of the bag. Here you can see how well the pumps empty out every last drop of water with the check valves shutting off the vent hose. That pretty much wrapped up the rear install. The original front install was very easy to do the piggy back as well. I removed this plug on the back of the factory center tank. Attached a matching threaded to barb adapter to the hole, and ran that hose to the front. The flyhigh bag is almost a perfect fit under the seat. Here it is on top. Here it is set under the seats empty. Here is the hose tucked up under the observers seat from the center tank. I put the hose on the port side lower flyhigh fitting because I wanted to try to be able to fill that side of the bag first seeing as how most of our riders are regular (port) riders. I forgot to take any pictures of drilling the bow bag vent thru-hull but I put it right below the starboard front tower mount just below the rub rail. I attached the vent line to the center upper fitting on the bow bag then to a check valve and then the vent thru-hull. Finally here it is full. It will pop the seat cushions up if no one is sitting in them. After all that agian I decided I didn't like the piggy back system and scrapped that idea. I put one more thru-hull in the bottom of the boat, and mounted the bow pump in the drivers foot area. From the pump I ran the hose to a Y and to both sides of the bow bag so it would empty correctly. I am VERY happy with how it works and now I just have to clean everything up and make it look pretty. I figure it puts 500# in front, 880# in the rears and whatever the factory center tank is 200-400#(?). For wakeboarding with a full crew of 6-7 it is too much weight for me to have it all full. The boat planes out, but has a hard time on the stock prop. If it is just myself and my wife it is still a bit too much but I am kind of a wimp... But for surfing with that crew of 4-6 sitting surf side, the surf side locker full, center tank full, and the bow bag full the wave is great! Just incase we have a light crew I have 4 launch pad 85# bricks to move around. So there you have it, that just ruined my whole evening putting this together...haha


Important Information
By using this site, you agree to our Terms of Use and Privacy Policy..