

Leaderboard

.thumb.jpg.060d370ad0226da8b37ee8dd6f706e09.jpg)
Popular Content
Showing most liked content since 03/01/2020 in all areas
-
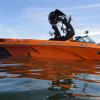
3 pointsIt Shipped this morning! Should be here Saturday. Here are a few pics that the salesman send today.
-
3 pointsA woofer change will not address this, as the current enclosure is the biggest factor in how the woofer sounds. You would need to change the enclosure volume. If the woofer is whats making all the unwanted noise, then you need to first determine if any external factor was the root case, before installing a new woofer.
-
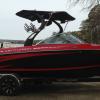
3 points2020 Ri257 (w/LSX). Canadian Blue Sparkle and White. Interior is standard white, hex black, hex deep bronze. I'm not swooned by the bombshell racks, so I have a set of PTM Edge wide-mouth clamp racks I'm trying to figure out how to get the right brackets to get mounted. Sorry for the kids tubing pic, its' one of the few I have with the interior. Our adults crew is 95% wakesurf.. and we hope to get the kids into it too. (my kids are only 6 and 8 y/o)
-
3 pointsThanks guys! Glad I could help Josh! Yeah, that’s what I seen/read Mob. I don’t do FB though. When it first started I told my wife “that’s the devil and I will never have an account”. Haha! at this point I’m kinda committed to that take! Haha! We can’t wait to get that ZS out on the water and get back to surfing!
-
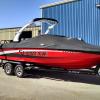
3 pointsQuick followup.. I went with the Ri257 (with the LSX) -- in all honesty because the Ri is more of a known quantity for me. I've spent 30+ hours on two different Ri257s, and I love the boat. It also became obvious from BoardCo answers that having the same hull means the boats are so similar it comes down to preferences. I was able to finally see an Fi23 in person, and overall I like the calmer RI styling and slightly higher freeboard for big Lake Tahoe, so that's the way I went. We took delivery two days ago.. and we couldn't be happier. Picture below. @BoardCo - Thanks so much for all your help answering questions on here, and posting awesome youtube videos of Centurions on the water! They really made a large purchase decision much easier. Your answer above helped me shed the FOMO of not having the Fi ski-pylon. @Duneit - We bought from https://www.mellomarine.com/ in Folsom, CA. Sally and Brandy have been fantastic to work with. Sally (the owner) negotiated the COVID-modified Tahoe boat inspection restrictions for us to get it in the water asap, and has been great.
-
3 pointsNew gas new filter drained can could not get can all the way off big black hose in the way of dropping down far enough so I just sucked out the gas in can and put back together fired right up and ran with no codes so thank you for your help
-
3 pointsSad this forum is not as busy as it used to be since so many jumped to the Facebook groups .. the FB groups are not nearly as easy to search, and the threads do not get organized well ...
-
3 pointsFinally did mine but went with the Angled Starboard and Port side specific LED's.
-
3 pointsI just had to replace my steering cable on my 05 SV230 and figured I’d add a few things that might be helpful. First, as I understand it, Teleflex no longer exists and was replaced by SeaStar so the new part number is SSCX15420. I ordered from Fredwarner.net and it cost $150 w/free shipping. I followed a lot of the guidance from above, but just to add a little more, I had to remove both water hoses from the back of the water pump to make accessing everything easier. Just unscrew the hose clamps and they pull off. I didn’t need to remove the water pump or sideswipe and was able to reach the cotter pin on the pitman arm fairly easy, and I’m on the husky side. The hardest part was getting the threaded nut on the steering cable unscrewed from the shaft housing that’s held in place by the clamp with the 4 bolts. I used an adjustable wrench but I THINK it’s about a 1 ¼” nut if you have a wrench that big. You could always take the new cable to a hardware store and find the right size wrench since the nuts are the same size. The shaft housing would turn with the nut when I would try to loosen the nut, but not as much as the nut, so it eventually came off but was a tedious process. I sprayed PB Blaster on the threads but I’m not sure if that even made a difference, perhaps some vice grips would help if you could fit them in there. Once I got that unscrewed, I pulled the cable/shaft out of the housing and then tied a rope to the end of the shaft where the retaining bolt would normally be. Before I could pull the cable out from the helm, I had to remove the paneling underneath the dash on the floorboard to access the hole where the cable comes out. The cable/nut got hung up on the gas tank, so I removed the floor panel to get access to the cable. This was well worth the few extra minutes, plus it made it easier to pull the new cable back through. I also agree that it’s much better to buy a new cotter pin; I tried the old one to no avail, but a new one went in on the first try. It’s definitely helpful to have a second person to lend a hand but is possible to do yourself. All together from start to finish, it took me about 3hrs which includes re-installing the under dash paneling and floor panel along with centering the steering wheel and rudder.
-
3 pointsHi again, all. Thought I'd post a quick update. We took the boat out about a week ago for a test run. Prior to heading out, I poured in two bottles of HEET to help absorb any water or bad gas. At the lake, we had the same problems with acceleration. It idles fine, goes okay at low speed, but dies out when going for higher speeds. We ended up getting it started and were able to drive slowly back and load it on the trailer. A couple nights later, I took off the old water separating fuel filter and poured the contents into a glass jar to see if there was water choking out the fuel system. There was no sign of water, sediment, particles, or anything. So as far as I can tell, there's no water in the fuel. (Glad to know that the filter is working well, tho.) When I went to O'reilly Auto this morning to pick up another Sierra Water Separating Fuel Filter (they can order them and have them in about a day for about $2 more than Amazon), I talked to one of the guys there. His brother used to have a Ski Nautique and Moomba, so he knows the engines and layout a bit. He said that since there's no problem with the actual fuel (from what I could see), the problem has to be in fuel delivery - most likely the fuel pump. He said that if the fuel pump diaphragm is cracked, it could have enough pressure to delivery the fuel at lower speeds. It wouldn't sputter or anything, but appear to be fine at lower speeds. But upon acceleration, when the diaphragm is working harder to deliver fuel to the engine, it won't be able to keep up, and the engine would end up stalling out. He said on trucks with the Chevy 350 small block engine, if there's a problem with the fuel pump (cracked diaphragm or whatever), the excess fuel gets squirted out of the pump as you drive, and it ends up on the ground or somewhere else on the pump housing where it can evaporate. But you can't do that on a lake, so the gas ends up being sent to the crankcase and mixes with the oil. So he said to pull the dipstick, wipe it on a clean paper towel, dip again, wipe again, and then smell. If it smells of gas, then it's probably a bad fuel pump. So I came home, followed the steps and..... It smells a heck of a lot like there's gas mixed in with my oil! I had just changed the oil in our 4Runner (full synthetic, but should have a similar smell to regular used oil), and I smelled both of them separately. The oil from the boat DEFINITELY smells of gas. So the next step is going to be to put on a new fuel pump, new water separating fuel filter, change the oil... and then at some point, I'll get the steering cable (got it from Ron today) and the bilge pump done, too. Thanks for helping out, @Timr71 and @InfinitySurf. I'll keep everyone in the loop as I move forward. I feel like I'm finally on the right path!
-
2 pointsFrom what I have heard around here that hull with the back cut outs on the transom make it hard to get a good wave….
-
2 pointsOn the Asymmetrical trim tab, I would worry about that down the road after the ballast is dialed. I did do the Asym plate and it was really useful for cleaning up the goofy wave and making wave length/height adjustments. Here's my Asymmetrical plate thread for anyone who is interested:
-
2 points
-
2 pointsHey Cliff, There is no wood in a 2005 Enzo. It is full fiberglass construction.
-
2 pointsUpdate: The block to add an Air Chair to the Maximus tower does not need a separate angle adapter and fits just fine. So far it has worked terrific.
-
2 pointsAble to check another small item off the list last night. Was having trouble getting the oil changed, no matter what I tried couldnt get the siphon tube down the dip stick tube. Finally figured out that the threads at the top of the dipstick fit a garden hose. Heres what I came up with, couple pumps and the oil started flowing. And after changing the filter a remote filter looks really appealing. Man what a pain. Used a couple plastic bags and was able to catch all the oil though, so no mess.
-
2 pointsThanks a bunch for all your advice guys. I decided the 2014 SV233 was my best option (newer, CATS, Ramfill, updated touchscreen, high altitude Acme 1847 prop, better looking exterior/interior) and made a deal today - HOORAY! The boat market in western Canada is much smaller and is crazy hot right now (as it turned out the 2012 SV233 I was considering also sold today) so I am thrilled to have secured a great surf boat now. The dealer agreed to give me first shot if any comparable Centurions came in on trade with 409 in the next few months. Many thanks to everyone on the Centurion Crew site for all the great posts - this is such a great resource.
-
2 pointsThanks for your perspective and advice on this. It is looking like pricing on used Centurion is universally (at least on the east coast) the same as you describe in TX. Definitely willing and able to go higher, not so certain I will have the opportunity. There are other very similar boats across state lines, so all is not lost. One thing I have read about here and other places is the importance dealer support and relationship, which is what makes me so concerned about the "vibe" of this interaction and what the future might hold if I end up buying this one. They're not the closest to me, but I hate to alienate anyone nonetheless. I'm in NC, but appreciate the offer for sure. I'll be spending a few early weekday mornings on the ramp when nobody is around to try to get my act together. Hopefully this will help me avoid or minimize the stage fright factor when a line of experienced folks are waiting for me to back down the ramp and launch.
-
2 pointsHeres the deal, its mostly about surface area. Two 12's in a ported enclosure is nearly 4X the surface area as a single 12 in a sealer or free-air (infinite-baffle) setup. So you would definitely experience a reduction in overall bass output.
-
2 pointsMy 08 Avy listed. Just my wife in the boat.
-
2 pointsjust put 2 tanks of fuel through a 'new to us' 20 Ri257. I can't believe how fuel-efficient it is. Coming from using a 20LSV- that thing was chugging fuel.
-
2 pointsI installed a new swim ladder for my boat, even with ballast its hard for my mom and some others to get up at times and I wanted them to feel comfortable since I had not heard any negative feedback regarding the swim ladder effecting the surf wave (and I can now confirm that it does not effect my surf wave the way I did it). Since only the new boats come with metal glassed in under the platforms and I have been too busy to go thru all that extra work, I decided to try something new as I did not want to use carriage bolts, I didnt want to drill thru my platform and then also have to replace the SeaDeck. That process didnt seem very strong to me, I imagine that will also let water into the center of the swim platform and for a guy as OCD as I am, I just couldnt bring myself too it. My thinking is if the process I used below fails.... then I will take the time to glass in stainless metal strips and will just cover the holes I made doing it this way. So, I ended up using 5/16" brass nutserts, 4 on each side and bolted up the frame using 5/16" stainless hex head bolts. 3/4" long would work but I did 1" long thinking that since the center of the swim platform is filled with the fiber I would drill the size hole needed for the nutsert and then "mushroom" the bottom of the cavity so I could add epoxy and strengthen it (I used a smaller drill bit and a hand pick to mushroom the bottom). It was time consuming but I after I prepped it all and had the nutserts ready to install.... I filled the hole with epoxy (I used a 2-part) and then inserted the nutsert using a makeshift bold. Immediately after the nutsert was in, I covered the bolt threads with wax so I could remove the bolts later (I used a commode wax ring for this) and then ran the bolt down all the way, it went thru the nutsert and into the epoxy bed I had created below it so the epoxy would cure around the bolt threads. I let it cure for 24hrs before removing the bolts so I could finish the install. I used 3M 4200 to seal everything and bolted down the swim ladder frame securely and then let that cure for another 24hrs. My thinking was that doing it this way, the swim ladder would be held not only by the nutsert which was also partially imbedded into the epoxy, but the bolts also continue threading into the epoxy and since the cavity was mushroomed, it would spreading out the weight more efficiently, this is also partially why I bought a swim ladder that had 8 bolt holes, but I also wanted one that had a spring loaded latch so the ladder would stay in place without velcro/rope holding it. I honestly don't know if my theory was correct on imbedding the bolts into the epoxy, but this swim ladder does not budge at all, I have probably been out 4 times since the install without any issues! Just before I started my install, I found another guy on the Malibu forum who was also installing his swim ladder the same way! Funny that we both had similar ideas.... I dont think he did the epoxy quite like I did, but he said his also turned out very strong. This is the ladder I bought ,NovelBee 3 Step Undermount Sliding Boat Ladder https://www.amazon.com/gp/product/B07YZL4MWR/ref=ppx_yo_dt_b_asin_title_o02_s01?ie=UTF8&psc=1 5/16" nutserts Holes with mushroomed cavity Bolt threads waxed and threaded thru nutsert and into epoxy to cure 3M 4200 to seal frame before bolting it up Installed
-
2 pointsFirst thing to check is the cap and rotor. Look to see if there is any corrosion on the metal inside the cap. Some caps also developed hairline cracks, you you may just want to change it. Its a cheap item and typically needs replacement every few years.
-
2 pointsI received the new brackets yesterday from Alloy Marine and they are nice. Going to install soon.
-
2 pointsWell I finally had enough people in the boat to do some surfing this weekend. The wave was great, and the surf RPM was 2900-3000 RPMs from 11.3 to 11.6 MPH with minimal current. There is more lift in the rear of the boat now, so I am going to move 100 pounds of lead from the front of the boat to the back and see how that works out. Not sure if I will get to test it before My Lake Powell trip at the end of the month or not.
-
2 pointsMatt, You have a great boat that will throw a great wave. But you are doing it wrong! Lose the suck gate! It does not need it. That boat likes to lean! 1100# in the surf side locker, 500# under surf side seats, Center ballast full. Minimal bow weight (maybe 125 # and wearing a bikini), stack all your people on the surf side and back seat toward the surf side. Perfect pass at 10.7 to 11.2 (GPS speed). Boom! Big and long wave with tons of push.... much more "playful". But seriously.....lose the suckgate and slump that thing. Suckgates are for hulls that are not shaped for surfing.
-
2 pointsSo I am very happy with the mod. With the 15.5 inch prop, I gained 2 mph at top end. Dropped 400 rpm at surf speed and 24 mph cruise speed. Does 28 at old 24 mph rpms. Holds all ballast with no issues now for surfing. I was able to accelerate to 15 mph (upstream) with all ballast full with testing quicksurf (with the 14 inch prop I could not get above 9). At normal lean I was at 3100 rpm for surfing setup. So if you have enough adjustments in your engine mounts (room to go up in front and down in back) and enough clearance in the through hull, then this mod is 100% worth doing. I am very happy.
-
2 pointsJust install new fresh air exhaust on my 2016 ri 237. Didn’t have to modify the stinger plate at all.
-
2 pointsThat's fantastic. I really like that the ladder in its down position is not completely vertical but at an incline. I will need to do this. When my in-laws clime up the platform, there is a sudden grunt, followed by a thud and sudden expulsion of air released somewhere behind me.
-
2 pointsFinal install pictures
-
2 pointsMultiple locations on the web will ship very quickly. I just ordered 2 water impeller pumps (one is for next year) from skidim.com and they shipped it that morning. They are located in SC. Depending on where your located it should get there by the weekend. I can't imagine it would be very difficult to change. A couple of hoses and bracket bolts to unscrew. The most difficulty thing is always the accessing the part that needs changing. I believe Skidim may also cross reference the engine you list and help make sure the parts are properly chosen. By the way, never order water pumps, spark plugs (especially the expensive ones), belts and other critical components from Amazon they are notorious for faulty, phony counterfeited products they will break.
-
2 pointsI’ve still got to button up everything and tighten the engine mounts, and get the strut bolts 4200’d and tightened, but here are a few pics of the change in clearance. On the supercharged engine, it is a pain to get to the six bolts. I’ll post some more pics later this week of the alignment and prop log clearances. After talking to ACME, they are recommending a 15.5x15 prop even if I have clearance for a 16” one, so I am going to hold off on countersinking the steel plate to see how the 15.5 performs. I should have slightly more clearance for the 15.5 than I currently have on the 14
-
2 pointsThread revival from the DEAD! I finally got my Krypt board rack put up after about 4 years. Bought them on clearance years back and I've always had DIY pvc racks for years. Wanted something a little more streamlined for the new shop (which isn't new now after 4 years ) Anyway here it is!!
-
2 pointsFinally got rid of my carpet and replaced the old flooring with Gator Step. Took a little time to get the template right but very pleased with the results.
-
2 pointsSure this is my 85 https://drive.google.com/file/d/1pZNl9UcEQoLYdknQXSFeNsEmpnGCzcXu/view?usp=sharing This is my 86 https://drive.google.com/file/d/1o7att_AaOzodIeOW9tc1KOzkRCn48Loy/view?usp=sharing
-
2 pointsMy Diacom software showed up. I installed it on a Windows 10 image in Parallels on my MacBook Pro. The software was able to read everything on my engine, and was able to clear my old O2 sensor codes. Other than the price, the software seems fairly good. It gave a histogram of how my engine has been run, the Amount of time At each RPM level, the octane of the fuel, etc. It also reads fuel flow while the engine is running. I plan to take it out this weekend and record some runs to see how the boat performs.
-
2 pointsif it doesn't have a dripless shaft seal, you should 100% install one first. the best thing to do is to keep water out of the boat, particularly the bilge where it can splash on everything.
-
2 pointsThis should be my final update in this thread. Both problems have been solved. For the steering, I followed @Timr71's suggestions and contacted Ron to get a new steering cable. Because there was also a bit of vertical play in the tilt steering assembly, I ended up replacing that, too. The new setup is solid as a rock, and it steers on a dime. For the loss of throttle, I followed @InfinitySurf's suggestions and followed the fuel. The carb looks okay. The water separating fuel filter was good. The culprit was the fuel pump. After putting the new fuel pump on and replacing the fuel filter with a new one, we took the boat out for a test. We were slowly driving along for a good bit at a slow speed. We turned back towards the ramp (so we'd at least be facing the right direction) and gave it some throttle. The boat responded and didn't let up. It was great! I kept waiting for the engine to die out on me, but it never did... it ran beautifully! MANY thanks to both Timr71 and InfinitySurf for your help! (InfinitySurf, checking the impeller is still on my list).
-
2 pointsIf you want push button start that's one thing but to buy it just to be able to keep the stereo on when turning off the boat is the wrong reason and spending money where you don't need to. When I purchased my boat same thing happened every time I'd turn the ignition off the stereo would shut down. All I did was find the power wire that feed the stereo rocker switch and run it to the power block that is supplied by the batt. That way the rocker switch is powered whether the ignition is turned on or off and you can control the stereo and components with the rocker and not be dependent on ignition power.
-
2 pointsOn #1, it does sound fuel related and probably the first thing would be to look at the carb and potentially do a re-build... if any ethenol fuel was left in there and the boat sat for a period of time, it could be gunked up in some places, perhaps clogging a jet. If it ran fine the first time you test drove it and then didnt.... point to possible trash in the fuel clogging something. However, it also points toward replacing any fuel filters you have in-line since it sounds like as you bump up the rpm, it starves for fuel and stalls so its not delivering the fuel the motor needs to run at the higher rpm's. I would also suggest replacing the fuel lines since if they are original they could be badly degraded on the inside, some of those old fuel lines will collapse as you increase rpm and not allow fuel flow. Doing a tune up is also in the cards since it could be related and is something you want to do regardless unless you know it was done recently....new plugs, wires and replace the distributor cap. Distributor cap gets corrosion on it and is a "wear item" and meant to be replaced every so often. That can cause all kinds of strange issues to happen. Don't forget replacing/servicing the impeller as that is really important to a healthy engine...at very least pull it and check the condition. (Pro tip)....use something like dawn dish soap rubbed on the impeller to make re-install super easy. You basically turn the impeller as you are pushing it back into the housing and with the soap lube, it goes much easier. It also helps impeller to stay in good condition since it will run dry a few seconds before the water gets too it when you re-start. #2 sounds like your steering cable is bad, that happens. You probably also have a grease zerk for your rudder box, its typically at the very back of the boat where the rudder box comes thru the bottom of the boat. That may help some....but likely your cable is the main culprit. Youtube has videos on how to replace, its not too hard... just be sure to use your existing steering cable to pull the new cable thru the hard to reach areas or you could spend a lot of time trying to fish the new cable thru the right places. Also check your rudder visually under the boat and make sure there is no obvious damage that is making the steering real hard....at that age it may be worth putting new packing in the rudder box at some point. Any maintenance you do is gonna make your overall experience better as well as keep the boat in top shape. Good luck and congrats on the boat. Good looking boat and the best family time ever
-
2 pointsSweet! Thanks for the help. I was a little surprised one can of clear coat got me through both vents. I’ve got a whole nother can since I got the 2 pack. Ventilation is key with that stuff
-
2 pointsSince we are back on the custom DIY ballast install topic I wanted to show a bit of what my install was about. So for a baseline my boat is a '03 Elite V Air Warrior with the factory center ballast only which uses a jabsco Water puppy to fill the hard tank under floor. My plan was to install a ballast system which would fill/empty on the move and would work equally as well for surfing as it does for wakeboarding. I wanted the majority of the ballast to be hidden but not take up ALL of my storage. The system consists of me adding 2 Launch Pad V-Drive Bags (from a previous boat, and will be upgraded to Flyhigh 750's) in the rear lockers and the Flyhigh wrap around bow bag in the front. At first I had the bow bag piggy backed onto the center ballast but that has since changed and is now on its own pump, thru-hull pickup and vents due to the slow fill and for more adjust-ability. I hoped to do like many others and keep track of every fitting, hose, clamp and pump but I have lost track after changing things here and there along the way. Parts - It started by ordering two Simer "Blue water" utility pumps from hardwareworld.com one for each Launch Pad in the rear lockers.Later I ordered one more for the bow bag. From boatownerswarehouse.com came the brass thru-hulls for the inlet/outlets, chrome thru-hulls for the vents and a number of pipe to hose adapters. From my local home depot the rest of the threaded pipe to barb hose adapters, ball valves, clamps, check valves and bulk hose was bought. Carling technologies dual throw / dual pole switches with lights were purchased on ebay. Switch covers to match my "Contura IV" factory switches were actually ordered from the dark side over at my local Mastercraft parts department. Finally the bow bag and flyhigh fittings were purchased on ebay as well. First thing was to make a rough diagram of the rear ballast setup. Here is the start to the parts for the install. First hole cut was the starboard locker vent. I put it in the factory location next to the bilge and center ballast vent. (3/4" chrome plastic 90 degree thru-hull) I replaced the factory black plastic for the chrome look thru-hulls. I cut a hole on the port side in the same location as the vents on the starboard side. Installing a chrome thru-hull. I choose to put the intake/output thru-hulls in the bottom of the boat so they were always underwater unlike the factory thru-hull on the stern. Here is the factory thru-hull for the center ballast tank. Yes I know it is VERY dirty. That has all been cleaned up. The previous owner kept the boat in the water and did not clean it very well, these pictures are from just after my purchase of it this spring. The thru-hull in the bottom on the hull were measured, mocked up, and cut just in front of the V-Drive. Again very dirty but there were some yellow marks showing my center of each hole, it was taped up and holes cut. Some silicone sealant put around the o-rings on the thru-hulls Both holes cut, thru-hulls in the holes, ball valves threaded into thru-hulls and hose attached. Under the dash I put fuses into the factory labeled holders, verified wire colors and then attached the powers and grounds from the fuse box to my switches. Wired up the switches and put them into the panel. I used 25 amp fuses as the Simer draw a higher amperage than the Johnson or Jabscos. ] The Simer Pumps are mounted in the front of the locker on the seat backs. Attached the hoses from the ball valves, and attached hoses then leading to the lower fittings on the bags. I ran the 10ft wires from the simer pumps up to the switches. Later I found the factory pump wiring in the Starboard locker tucked up under the edge so I used that and removed the extra wiring. Some of you will notice the giant rectangular holes the previous owner cut into the seat back for "bass ports" for the huge sub boxes he had in the lockers... I am building some covers to put over the pumps to protect them, and using those ports as vents with some slotted covers on the seat side. The poor boat was butchered by the audio install shop / last owner. I set the bags in the lockers, attached the vent line to the 5psi check valve (so the bags will go into a vacuum when emptying) and attached the check valve to the TOP of the bag. Here you can see how well the pumps empty out every last drop of water with the check valves shutting off the vent hose. That pretty much wrapped up the rear install. The original front install was very easy to do the piggy back as well. I removed this plug on the back of the factory center tank. Attached a matching threaded to barb adapter to the hole, and ran that hose to the front. The flyhigh bag is almost a perfect fit under the seat. Here it is on top. Here it is set under the seats empty. Here is the hose tucked up under the observers seat from the center tank. I put the hose on the port side lower flyhigh fitting because I wanted to try to be able to fill that side of the bag first seeing as how most of our riders are regular (port) riders. I forgot to take any pictures of drilling the bow bag vent thru-hull but I put it right below the starboard front tower mount just below the rub rail. I attached the vent line to the center upper fitting on the bow bag then to a check valve and then the vent thru-hull. Finally here it is full. It will pop the seat cushions up if no one is sitting in them. After all that agian I decided I didn't like the piggy back system and scrapped that idea. I put one more thru-hull in the bottom of the boat, and mounted the bow pump in the drivers foot area. From the pump I ran the hose to a Y and to both sides of the bow bag so it would empty correctly. I am VERY happy with how it works and now I just have to clean everything up and make it look pretty. I figure it puts 500# in front, 880# in the rears and whatever the factory center tank is 200-400#(?). For wakeboarding with a full crew of 6-7 it is too much weight for me to have it all full. The boat planes out, but has a hard time on the stock prop. If it is just myself and my wife it is still a bit too much but I am kind of a wimp... But for surfing with that crew of 4-6 sitting surf side, the surf side locker full, center tank full, and the bow bag full the wave is great! Just incase we have a light crew I have 4 launch pad 85# bricks to move around. So there you have it, that just ruined my whole evening putting this together...haha
-
1 pointWe talked about this in the "Older Centurion" thread. Do you have a Tru-Trac or a Falcon? If yes, post a pic or multiple pics of it here. Have a good work around or modification, post it here. Questions? Post them here. I have some old brochures, I'll post them up this evening. Here's a pic of my 1993 open bow Falcon.
-
1 pointHey @Avy06: how is this working for you so far? Our platform bracket busted on Monday, so I'm about to pull the trigger on the Alloy Marine ones for our 2007 Typhoon. Did the new 2-1/2" bolts work well with the thicker transom plate, or did you need something longer? I'm assuming you went with the 316 stainless instead of 18-8, but if you have any more details to share, it would be greatly appreciated.
-
1 pointYour tower is a Double Up tower. Check greatlakesskipper. They might have a factory cover for a good price. I was able to get 2 covers from them for my previous boat (2007 Avalanche with Double Up).
-
1 pointWell since the boat is out of commission for awhile, I was able to get the gator step installed. Took some back and forth with a couple of the templates, but I'm pretty happy with how it turned out. The two biggest pieces arent perfect but I'm probably the only one that will notice. Got a couple air bubbles that I couldnt get out, took a razor and was able to get the air out and I think it'll be fine.
-
1 pointI concur with Bigcat. I sold an ‘07 Avy at the end of 2016 for $37,500. It was in great condition with about 300hrs, custom ballast, etc. I’ve seen the same boat in worse condition with less options listed for $40k recently. With the cost of new wakeboats going up and up, the resale market for wakeboats has done the same. I actually made $ on my Avy after about 7yrs of ownership. That said, you could make an offer at $20-$21k or something like that citing the issues you described above. Worst thing that can happen is he says no. The high engine hrs are expected for a boat of that age, but would be the most worrisome part of the deal to me. It might be worth the peace of mind to take to a shop for a compression test/overall checkout.
-
1 pointIt's not easy to capture what the wave looks like from a camera... here is a video of one of my wife's sessions where I moved the camera around enough to see some perspective on the wave (regular side). (the audio is jacked, there must have been water in the mic) 2020 Centurion Ri257 Wakesurfing Lake Tahoe - YouTube And here is one of my better 360 attempts (goofy side).. (have not nailed it yet, but I hope to this summer!) And I was *not* in charge of the playlist here. 2020 wakesurf 360 attempt - YouTube
-
1 pointI sent you some emails with the engine manual, the Morse control manual and the brochure. You're on the right track for sure with the carb and cleaning/replacing all inline fuel filters. Hopefully, all old gas has been siphoned from the tank and replaced with fresh. The bowls in the carb need to be drained and cleaned. The tube behind the dash is a protector for the rack and pinion steering, and yes it should be greased. But, I'm not really an expert on that. You'll need to seek out some better guidance on repair and maintenance of that item. Same of the steering tilt. The good news is that all that you have can be made to work as good as new. Good luck! Keep updating us. More pictures!
-
1 pointSo, today was the day to finally get the boat on the water to test out the new A-Plate! The day started out ok, got the trailer hooked up with ease. Truck pulled the trailer to the lake just fine. Then it all went south from there. LOL. Tried to start the boat... deadish battery. No problem, I carry a booster pack! Dead too. Even though it worked to start my mother-inlaw's jeep yesterday. Ok. After asking countless other boaters including a very nice Enzo for help to no avail, FINALLY my wife noticed these two fishermen off the side of the ramp putting a car battery into their little aluminum boat with a tiny trawling motor. So they gladly let me borrow it to jump my boat. AND IT WORKED! So I thanked them profusely and we were on our way. Idled out the no wake zone, let her warm up, then checked out the wakeboard wake. Looked the same to me. Up next, goofy surf wave. Ballast pump got air locked. After messing about with it for 10 mins or so, that started working. Alright, here we go. My buddy lost out to rock paper scissors and had to go first. The water was DAMNCOLD! An actual temperature here in Canada. Anyway, he finally gets in and we're under way. but within about 30 seconds there's what feels like a fuel issue, a stutter of sorts. Then I notice the Vdrive light is flickering! NOOOOOO! So I shut it down, tried again, but same results. Drained ballast and idled back to the dock. Once we got home I texted Dreamer, Wiggles and Duramat to tell them my dilemma. All of whom got back to me almost instantly! Dura even went the extra mile to search out TotalPerformance's thread of changing the V-drive oil out! Came in extremely handy! So it turns out I only had about 400ml or less than 1/2 a quart of oil in there! So I followed Total's awesome thread and it's now full... Lets hope it doesn't have a bad leak. So far so good! ANYWAY!! Here's a picture of the wave we had for about 20 seconds! The spray has been SIGNIFICANTLY knocked down and this is with only 1 400lb bag on the rear seat and my wife sitting in the right spot. We usually run another 400 on the floor and even a FATBRICK on the swim grid to try and get rid of the wash. So all in all, the plate was a success, but the day was a nightmare. Although, in the grand scheme of things, even todays issues weren't THAT bad.


Important Information
By using this site, you agree to our Terms of Use and Privacy Policy..