

Leaderboard


Popular Content
Showing most liked content since 01/20/2021 in Posts
-
2 pointsFrom what I have heard around here that hull with the back cut outs on the transom make it hard to get a good wave….
-
2 pointsOn the Asymmetrical trim tab, I would worry about that down the road after the ballast is dialed. I did do the Asym plate and it was really useful for cleaning up the goofy wave and making wave length/height adjustments. Here's my Asymmetrical plate thread for anyone who is interested:
-
2 points
-
2 pointsHey Cliff, There is no wood in a 2005 Enzo. It is full fiberglass construction.
-
2 pointsUpdate: The block to add an Air Chair to the Maximus tower does not need a separate angle adapter and fits just fine. So far it has worked terrific.
-
2 pointsAble to check another small item off the list last night. Was having trouble getting the oil changed, no matter what I tried couldnt get the siphon tube down the dip stick tube. Finally figured out that the threads at the top of the dipstick fit a garden hose. Heres what I came up with, couple pumps and the oil started flowing. And after changing the filter a remote filter looks really appealing. Man what a pain. Used a couple plastic bags and was able to catch all the oil though, so no mess.
-
2 pointsSince we are back on the custom DIY ballast install topic I wanted to show a bit of what my install was about. So for a baseline my boat is a '03 Elite V Air Warrior with the factory center ballast only which uses a jabsco Water puppy to fill the hard tank under floor. My plan was to install a ballast system which would fill/empty on the move and would work equally as well for surfing as it does for wakeboarding. I wanted the majority of the ballast to be hidden but not take up ALL of my storage. The system consists of me adding 2 Launch Pad V-Drive Bags (from a previous boat, and will be upgraded to Flyhigh 750's) in the rear lockers and the Flyhigh wrap around bow bag in the front. At first I had the bow bag piggy backed onto the center ballast but that has since changed and is now on its own pump, thru-hull pickup and vents due to the slow fill and for more adjust-ability. I hoped to do like many others and keep track of every fitting, hose, clamp and pump but I have lost track after changing things here and there along the way. Parts - It started by ordering two Simer "Blue water" utility pumps from hardwareworld.com one for each Launch Pad in the rear lockers.Later I ordered one more for the bow bag. From boatownerswarehouse.com came the brass thru-hulls for the inlet/outlets, chrome thru-hulls for the vents and a number of pipe to hose adapters. From my local home depot the rest of the threaded pipe to barb hose adapters, ball valves, clamps, check valves and bulk hose was bought. Carling technologies dual throw / dual pole switches with lights were purchased on ebay. Switch covers to match my "Contura IV" factory switches were actually ordered from the dark side over at my local Mastercraft parts department. Finally the bow bag and flyhigh fittings were purchased on ebay as well. First thing was to make a rough diagram of the rear ballast setup. Here is the start to the parts for the install. First hole cut was the starboard locker vent. I put it in the factory location next to the bilge and center ballast vent. (3/4" chrome plastic 90 degree thru-hull) I replaced the factory black plastic for the chrome look thru-hulls. I cut a hole on the port side in the same location as the vents on the starboard side. Installing a chrome thru-hull. I choose to put the intake/output thru-hulls in the bottom of the boat so they were always underwater unlike the factory thru-hull on the stern. Here is the factory thru-hull for the center ballast tank. Yes I know it is VERY dirty. That has all been cleaned up. The previous owner kept the boat in the water and did not clean it very well, these pictures are from just after my purchase of it this spring. The thru-hull in the bottom on the hull were measured, mocked up, and cut just in front of the V-Drive. Again very dirty but there were some yellow marks showing my center of each hole, it was taped up and holes cut. Some silicone sealant put around the o-rings on the thru-hulls Both holes cut, thru-hulls in the holes, ball valves threaded into thru-hulls and hose attached. Under the dash I put fuses into the factory labeled holders, verified wire colors and then attached the powers and grounds from the fuse box to my switches. Wired up the switches and put them into the panel. I used 25 amp fuses as the Simer draw a higher amperage than the Johnson or Jabscos. ] The Simer Pumps are mounted in the front of the locker on the seat backs. Attached the hoses from the ball valves, and attached hoses then leading to the lower fittings on the bags. I ran the 10ft wires from the simer pumps up to the switches. Later I found the factory pump wiring in the Starboard locker tucked up under the edge so I used that and removed the extra wiring. Some of you will notice the giant rectangular holes the previous owner cut into the seat back for "bass ports" for the huge sub boxes he had in the lockers... I am building some covers to put over the pumps to protect them, and using those ports as vents with some slotted covers on the seat side. The poor boat was butchered by the audio install shop / last owner. I set the bags in the lockers, attached the vent line to the 5psi check valve (so the bags will go into a vacuum when emptying) and attached the check valve to the TOP of the bag. Here you can see how well the pumps empty out every last drop of water with the check valves shutting off the vent hose. That pretty much wrapped up the rear install. The original front install was very easy to do the piggy back as well. I removed this plug on the back of the factory center tank. Attached a matching threaded to barb adapter to the hole, and ran that hose to the front. The flyhigh bag is almost a perfect fit under the seat. Here it is on top. Here it is set under the seats empty. Here is the hose tucked up under the observers seat from the center tank. I put the hose on the port side lower flyhigh fitting because I wanted to try to be able to fill that side of the bag first seeing as how most of our riders are regular (port) riders. I forgot to take any pictures of drilling the bow bag vent thru-hull but I put it right below the starboard front tower mount just below the rub rail. I attached the vent line to the center upper fitting on the bow bag then to a check valve and then the vent thru-hull. Finally here it is full. It will pop the seat cushions up if no one is sitting in them. After all that agian I decided I didn't like the piggy back system and scrapped that idea. I put one more thru-hull in the bottom of the boat, and mounted the bow pump in the drivers foot area. From the pump I ran the hose to a Y and to both sides of the bow bag so it would empty correctly. I am VERY happy with how it works and now I just have to clean everything up and make it look pretty. I figure it puts 500# in front, 880# in the rears and whatever the factory center tank is 200-400#(?). For wakeboarding with a full crew of 6-7 it is too much weight for me to have it all full. The boat planes out, but has a hard time on the stock prop. If it is just myself and my wife it is still a bit too much but I am kind of a wimp... But for surfing with that crew of 4-6 sitting surf side, the surf side locker full, center tank full, and the bow bag full the wave is great! Just incase we have a light crew I have 4 launch pad 85# bricks to move around. So there you have it, that just ruined my whole evening putting this together...haha
-
1 pointI haven’t heard much in terms using a wake shaper on an Enzo. My opinion is that you probably don’t need it. That Enzo hull likes to lean. Start by filling your Enzo sac on the port side, keeping the starboard empty, and running at 10.5 mph. You’ll probably end up needing more weight, but that will give you a good baseline to start from. Adding weight to the rear/under the port side seats will make the wave bigger. You can play with the speed too (I wouldn’t recommend over about 11), but if I recall correctly, 10.5 is what most of us were running with Avys/Enzos back in the day.
-
1 pointIt’s not possible to upgrade the valves, just look for a 2022 or newer. At lower elevation the 6.0 HO will move that boat fine. If you ride with a big crew or run lead, or plan on going up in elevation Id go ZZ6, keep in mind the ZZ6 will be the more desirable mill and better for resale down the road. 2907 prop or similar will be necessary with the 6.0.
-
1 pointI'll take some pictures this weekend. Yeah, tons of rain here in western Oregon, snowed on me yesterday. Lake time is definitely delayed from previous years.
-
1 pointCongrats on the new purchase! If I recall correctly from my old '07 Avalanche, it was the same way. But thinking about it now, I'm curious. I'm going to have to check on my ZS and see how it works. We are rarely on the lake after dusk, so the lights don't get much use.
-
1 pointNevr-Dull always worked well for me. https://www.walmart.com/ip/Eagle-One-1035605-Nevr-Dull-Wadding-Polish-5-oz/15125758
-
1 pointHi, Has anyone installed mechanical stereo volume controls? Looking for dedicated buttons or rotating knob as I find the touch screen only volume controls less than ideal. Boat: 2021 Centurion VI22 Stereo: Centurion CHAMP Audio Package w/1 pair BLACK Pro Rev10 Wet Sounds Tower Spkrs, Integrated ICE Stereo, AM/FM USB On-Screen Controls, 8" BLACK Interior Spkrs and 12" Sub Thanks!
-
1 pointNot sure the best place to put this, but I will use this as a place to show projects, upgrades, learning about the boat, ask questions, maint., have conversation, etc. And possibly help others in a similar situation as I try and figure everything out. Introduced the boat up in the show us your boat thread. Got a 12 x 30 metal carport installed last week for storage, so thats a win. Ordered a Acme 1619 from wakemakers and they had it to me in literally a day. Also got a prop knocker to remove old prop. Was struggling with the prop knocker, zero movement. Sucked it up and ordered a c clamp puller from Bakes (wakemakers was out). Ended up having to beat on the back of the puller a fair amount, but eventually prop came loose. Prop mustve been on there for quite awhile. Kinda surprising old prop was Acme 817 that I will use as a spare. Surprising because boat came equipped with bags to get boat pretty heavily weighted, I assumed they wouldve been running little more surf friendly prop. Anyway got new prop installed super easy, torqued to 40lbs, and now just gotta wait for another nice lake day to test it out. Paper test fit pieces and mylar from gator step showed up in the mail, so will be tackling that very soon.
-
1 pointI have no such issues like above.. was just searching for Avalanche info and came across this thread. Much thanks to you @Dan gib for following through on these threads and posting. Finding a solution to the problem is helpful to many, even if it feels likes its on deaf ears. Kudos my man!
-
1 pointThank you for the reply! Replaced the valves in the back and updated the computer and we were off to surfing! Can't thank #boardco enough for their help! Still get some ghosting but nothing like before. Still have to address the the annoying minute beep but will order a reader for that. Have you or anyone else had grounding issues with this year boat? When I flip my toggle to navigation everything turns on as if I push ignition button....not sure if that normal or not? Again thanks for the reply this boat is all new to me!
-
1 pointAlso it’s a 2006 23’ typhoon but the late year model with the deeper-v hull w/o the cut outs and the c 4 wrap around seating…
-
1 pointYep. You're good to go. This is what the older hull with the cutouts looked like: https://www.riverdavesplace.com/forums/threads/2002-centurion-23-concourse-mercury-350-mag-open-bow.176722/
-
1 pointThanks for the reply. Glad to hear it’s not just me and I wasn’t missing something. We had to replace the starter this weekend (which was zero fun) but afterwards the v drive light worked correctly. Maybe I was just understanding it incorrectly the first time out. Now onto gauges, stereo, and ballast pump issues. This is a great forum for help. Thanks again
-
1 pointIt takes the Diacom software to clear it. Post in one of the Facebook groups and see if there are any members nearby that have the software and adapter to connect to the PCM engine.
-
1 pointThanks for the heads up. The actuators to switch sides definitely work. I used them all last summer and just took them off the boat. I'll put them up in the Classifieds.
-
1 pointYou can probably get this made by SendCutSend. They are a site that you send a cad to and they will machine whatever you like.
-
1 pointThat is not normal. Mine travels from 0 - 100 moving at every 5% increment. I actually set it to 45 at the most aggressive, and usually am about 55-60 for my normal surf style setting. My wife prefers skim so she likes it mellow like 90-100.
-
1 pointThank @jtryon and @Troy. R I got the FLY HIGH FATSAC 650 CENTER LOCKER / REAR SEAT BAG & SUPA TSUNAMI PUMP (650 LB) and it fits great.
-
1 pointThat's exactly what I ended up doing after a days worth of trial and error. Listing seems to help with the size of the wave more than the tabs. I dialed a starboard wave that was very surfable but was unable to produce a clean lip on the port side for my regular riders. Thanks for your input
-
1 pointHi Shane, I think this might be the one I used (now called a 650# sac: https://www.wakemakers.com/fly-high-rear-seat-sac.html But like @jtryon said, you just need a sac that is 10 x 26 x length from rear locker to observer seat.
-
1 pointI can’t contribute much to this convo, but to second what Troy said, my dealer also told me the ZS throws a better surf wave then the FI. Could have something to do with the Fi 21/23’s 32” of draft vs 36” of the supreme and other centurions. We were sold on the style and looks of the ZS, wife and I both love it, the lower price also helps.
-
1 pointIf you have no interest in fixing it and keeping it, I agree with you that I wouldn't want to deal with trying to fix it and flip it. If you can take it and the $47k, there is some value in the boat for sure. There are plenty of people that aren't afraid of a project and would take it off your hands for $5k-$10k or so. As @jtryon suggested, the motor alone has pretty good value. I also agree with @Bigcatpt that it's a good idea to take this question to the Facebook group. You might even find a buyer there... Do you know if the title is "salvaged"? I know it works differently with cars than it does boats. Cars are immediately deemed "salvaged" when the insurance totals it and pays you out for it regardless of the extent of the damage. It is not exactly that way with boats. For example, I bought my old Avalanche from a boat repair shop that had bought it from an insurance company after it was "totaled" and the previous buyer was paid out. The story I got was, the previous owner didn't have the trailer coupler properly connected to the ball, turned a corner leaving his neighborhood, trailer came off ball causing damage to the trailer, breaking the windshield and tower, and cracking the hull above the rubrail in the rear by the engine vents. The title was not salvaged on that boat. That said, I also agree with Bigcat that if the title is salvaged, obviously the value and potential buyer pool are reduced. But, if it is not salvaged for some strange reason, that could make it more appealing to someone who isn't afraid of the project... I did a quick search on 2007-2010 Enzo's on Boattrader and your boat in good condition with a trailer is worth low $50k-ish, so $47k and you take the boat isn't too bad of a deal.
-
1 pointNice! That S220 looks like it’s a great boat. Boardco has some good videos on YouTube for setting up and fine tuning your surf wave on a Centurion that I found to correlate well to my ZS. I’m sure they would be useful to you on the S220 as well.
-
1 pointMine is a 2019 450, not a ZR409, but the same 6.0L block. Mine takes 5 quarts. It wouldn't be a terrible idea to fill with 4.5 quarts and take the extra 1/2 quart out with you next time you take the boat out. On the water is the most accurate reading...
-
1 pointWake shapers were not out yet when I had my Avy either, but my understanding is that the Avy hull is better off without a wake shaper and just using good ole' displacement to lean it over. We would run ours with the rear corner of the rubrail under water.
-
1 pointThanks for the tips guys. Following the advice here (starboard tanks full, port side empty, people sitting the starboard side, trim all the way down) produced a much better wave on the starboard side. Not quite as large as on the port side or as clean, but pretty close. Before the adjustments there was no surf-able wave on the starboard side. The goofy surfer is happy.
-
1 pointWell I bought it. The sea trial went well. It is a sweet boat. I can’t wait to take it out and start surfing.
-
1 point@TroyI also need to say the bag has been spoken for by another member of this page. I got a replacement boat with the insurance money from the one that sunk that needed a total restoration and this guys been a lot of help showing me what he's done with his boat and gave me enough info to decide which way I wanted to go with mine.
-
1 pointHey Mike, Congrats on the boat! I used to have an ‘07 Avy. It can really throw a great surf wave. I never used any type of wake shaper, but it’s my understanding that they are not useful with the Avy hull. There are a few ways you can approach it. 1) go with custom fat sacs that fill the entire locker and area under the seat. 2) You’ll want to start by putting an 1100 lb. fat sac in the surf side corner. Then get another sac that fills up the entire area under the surf side seat. In my case, we all surfed regular, so I had 1100s in both lockers and a 580 under the port seat. It was all plumbed in and controlled by switches at the helm like it was factory. There are other mods you can do like an asymmetrical winged trim tab but you’ll want to start by sinking the surf side rear corner.
-
1 pointThat compartment is a built-in ice chest. From the factory they are gel coat on the inside.
-
1 pointJust closed on a 2021 ZS232 this week. I only have the actual factory pic as the boat is wrapped for the Winter in Minnesota. Moved up from a Yamaha 242x, which was a great family boat, but not what I needed for water sports. Inventory is limited and moving fast this year, so don't wait if you are in the market. I also noticed a lot of water sports accessories (vests, etc...) are on back order. Hope to keep this forum active as I don't do FB. Let me know if any of you boat on the St Croix River. Hope to see you this Summer.
-
1 pointM650 of the new M6-650? These are worlds apart in sound quality and the M650 has been discontinued for about 3 seasons now. If FADE is desired, a 2 chnl amp will typically get you more wattage for less $$$. Or if there is a 3rd pair of speakers in the future, then go with a 4 chnl. JL has always built a solid product, so cant go wrong with them. However, Rockford is not a bad line either. My go-tos are Kicker and Wet Sounds. However, it may come down to waiting for inventory to come back in or taking whats available. Ive been using some Fusion Signature series and Roswell R1 amps lately. Seem solid. Traditional single DIN........Clarion M508.
-
1 pointTry what the second post says. Good luck.
-
1 pointHey guys, first post, but I've already gotten a ton of info off this forum. Pretty much the reason I searched specifically for a Avalanche. Got this 2006 a couple months ago from a dealer in Canada. Was a bit of a risk, had to purchase before ever seeing it in person because the border is closed. Overall have found a few small surprises, but nothing to big. Its a well taken care of boat. I searched for about 4-5 months and think it was the best choice with what is on the market. Its the same boat as page 13 of this thread. An Infinity surf system is sitting in the garage waiting to be installed. A FAE system is sitting in the garage waiting to be installed to eliminate the sideswipe. Will be placing a Gatorstep order soon. Will be ordering a new prop, it currently has the 817 Acme on it. Got the following maintenance completed and took it for its first drive Saturday to learn the boat. Its our first inboard, so a bit of a learning curve coming from I/O. Changed V Drive fluid Changed Transmission fluid, couldn't get it all out, so just added back in what I took out. Replaced both fuel filters Put in new impeller Greased V Drive shaft Greased rudder All new blue plugs I was unable to change the oil. The tube I have for the extractor pump is super small but wont get all the way down the dip stick, it hangs up on something, even the dipstick itself doesn't go in easily. The top of the dipstick has some sort of fitting on it. Please see picture. What do I need to accomplish this? Heres a few pics
-
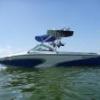
1 pointWe brought home our 2019 Fi25 last week and had our first session the day after. I consider myself lucky to score a session on a new toy the day after I get it. It doesn't always work out that way. One result of that quickness to rally kept me from having the opportunity to mount the rear view mirror which came with the boat. That proved to be a challenge as we tried adjust the surf settings without really being able to see the wave change. I am not a fan of mirrors clamped on the windshield anyway and wanted to try a rear view camera instead. That is the upgrade that this first post is about. We purchased a rear view camera and display on Amazon a few days before picking up the boat from NWBS in Oregon City. https://amzn.to/2DEgZTg I spent some time figuring out how and where to mount the display above the OEM dash in good view of the driver without blocking the view in front of the boat. Scratched my head a bit, took some patterns, did some CAD work and machined some parts shown below next to the display for the camera. Figured out where to place the camera on the back of the boat. Wire was run along the right side under the seats. Then continued to fit the CNC'd mounts to the dash. Happy these were a perfect fit right off the bat. This step usually requires some iteration of CAD tweaks and CNCing of more parts until the fit is right. A bit of skill and luck this time around. Used some 3M VHB to attach the mounts to the back of the display. This camera is designed with some straps that normally wrap around a rear view mirror. I trimmed those off and removed the pads that rest against the mirror surface. That is were my brackets attach to the back with the VHB. Then I mounted the camera on the dash. I will add some VHB between the mounts and dash to hold it in place. This was just a test fit to verify the position. Here is the view from the driver seat. Back of barn and CNC machine are shown in the image. We will have to see if this is angled right when on the water but think it looks pretty good. Note that the display is actually upside down. The camera is designed to be mounted above a license plate on the underside of the cover that normally is above them. Having the display upside down actually improved the wire routing which I still need to clean up a bit. So this all worked out for the better. This camera also has a built in front view cam which can 'see' through' the windshield but we won't be using that feature. It can record and do a host of other things which may be fun to try. We can actually record our sessions on a thumb drive so that might be cool. It's 1080P so resolution will be pretty good. Will post some videos when we get a chance to test it out. All the best, Hein
-
1 pointI've been a Nautique owner for the past 15 years and I decided to give Centurion a try. As such, I just bought a used 2017 RI257. I love the boat so far, as does the wife, however, it would be great to add the top side hatch to the pedestal behind the driver seat that the 2020+ RI's have. Has anyone done this to their pre-20 RI? Or at least, does anyone know if the pedestal is the same between a pre-20 and 20+ RI257? P.S. I live in the Reno/Tahoe area and would love to connect with some other Centurion owners... -Bill
-
1 pointcheck for scoring on the water pump when you have the impeller changed. if you feel ridges in the intake side of the pump where the impeller spins, have that half of the pump replaced otherwise it may not prime at idle and you will overheat.
-
1 pointI started with 400 and worked my way up to 2000. Then polished with 3m finess it and buffed with Star brite marine polish.
-
1 pointI have started the InfinityWave surf tab system install on my 2014 SV244. I am totally pumped about this and look forward to testing as soon as these storms move out. Here are some teaser pics in the meantime. Tabs and actuators/wires all fully mounted and in place... just need to finish permanently installing my wiring and then fabricate my bracket to mount the switches at the helm since I dont want to drill into my dash at this time. Tabs look really good and I temp wired everything together last night to test it all, everything worked very well and I am excited at the prospect of soon being able to control my surfing with the switches! Shaka is very responsive, these guys are obviously dedicated to making sure that everything works well and they provide a quality product for a very fair price. I think this is gonna be a homerun!
-
1 pointOkay, this is going to sound ridiculous but it's true. I had the exact problem with my 2017 s238 and discovered a few others having the same problem. What we found is that the safety lanyard at the base of the throttle is SUPER sensitive to being bumped so when I was towing a goofy side rider with my body twisted to the right or came off throttle I would hit that switch VERY lightly with my knee/leg and everything would die. It was happening while towing and I had people run into the boat! Cwazy also had this problem and we both modified the safety lanyards on our boats so it couldn't be bumped. It has never happened again.
-
1 pointThanks guys! We are at 7500 elevation and altitude HP loss along with a heavily weighted boat are the real issue here. I've tried swapping props but do not want to trade off top end speed for hole shot. Looking for alternatives and this one seemed pretty good.
-
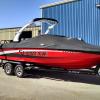
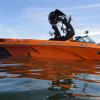
1 pointSo, today was the day to finally get the boat on the water to test out the new A-Plate! The day started out ok, got the trailer hooked up with ease. Truck pulled the trailer to the lake just fine. Then it all went south from there. LOL. Tried to start the boat... deadish battery. No problem, I carry a booster pack! Dead too. Even though it worked to start my mother-inlaw's jeep yesterday. Ok. After asking countless other boaters including a very nice Enzo for help to no avail, FINALLY my wife noticed these two fishermen off the side of the ramp putting a car battery into their little aluminum boat with a tiny trawling motor. So they gladly let me borrow it to jump my boat. AND IT WORKED! So I thanked them profusely and we were on our way. Idled out the no wake zone, let her warm up, then checked out the wakeboard wake. Looked the same to me. Up next, goofy surf wave. Ballast pump got air locked. After messing about with it for 10 mins or so, that started working. Alright, here we go. My buddy lost out to rock paper scissors and had to go first. The water was DAMNCOLD! An actual temperature here in Canada. Anyway, he finally gets in and we're under way. but within about 30 seconds there's what feels like a fuel issue, a stutter of sorts. Then I notice the Vdrive light is flickering! NOOOOOO! So I shut it down, tried again, but same results. Drained ballast and idled back to the dock. Once we got home I texted Dreamer, Wiggles and Duramat to tell them my dilemma. All of whom got back to me almost instantly! Dura even went the extra mile to search out TotalPerformance's thread of changing the V-drive oil out! Came in extremely handy! So it turns out I only had about 400ml or less than 1/2 a quart of oil in there! So I followed Total's awesome thread and it's now full... Lets hope it doesn't have a bad leak. So far so good! ANYWAY!! Here's a picture of the wave we had for about 20 seconds! The spray has been SIGNIFICANTLY knocked down and this is with only 1 400lb bag on the rear seat and my wife sitting in the right spot. We usually run another 400 on the floor and even a FATBRICK on the swim grid to try and get rid of the wash. So all in all, the plate was a success, but the day was a nightmare. Although, in the grand scheme of things, even todays issues weren't THAT bad.
-
1 pointi know this is bringing up an old thread but have just done this on mine. had to remake the cup holder section to reposition the cup holders and to make room for the speaker. there is also a hole for the speakers cushion frame you just have to cut the vinyl, but the speaker is out there to get damaged by careless kids. in the cup holder holder area i feel is less likely to get damaged by a stray elbow or foot.
-
1 pointadding grease to the rudder helps it seal out water it will do nothing for hard steering.If the boat steering wheel does not spin with one finger when out of the water it is time for a new cable.................H


.thumb.jpg.060d370ad0226da8b37ee8dd6f706e09.jpg)


Important Information
By using this site, you agree to our Terms of Use and Privacy Policy..