Jump to content

Mike Christie

Crew
  • Content count

    46
  • Joined

  • Last visited

  • Days Won

    1

Everything posted by Mike Christie

  1. PSS Shaft Seal

    THIS ADVERT HAS EXPIRED!
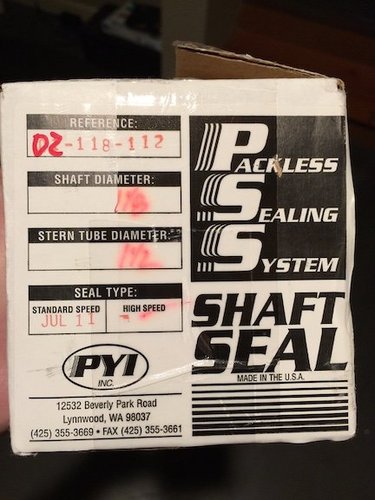
    • FOR SALE
    • NEW

    My loss....your gain. Bought this when I had my Enzo and never installed it. Brand new and still in the box. I was doing a little garage cleaning this weekend and came upon this again. Summer is just around the corner, time to get that boat ready!

    $75.00

  2. You should check the crew classifieds
  3. March picture thread

    50 Degrees in the water, but thanks to the Patagonia dry suit, we got after it a bit early this year.
  4. 2006 SV230 Ballast Set Up

    The SideSwipe is basically a 6" diameter tube that runs perpendicular to the engine, or parallel with the transom of the boat. There are big covers or boxes that cover up this tube, essentially making a shelf in the back corner of the boat. The Enzo bag stops right at the front of this box, Therefore leaving a lot of extra space for ballast if you don't have the SideSwipe. As I mentioned above, I do have the SideSwipe and I first started with the 1100 lb bags thinking that I could lay them over these boxes, and while it worked, it was not ideal. They kept getting twisted up and were a total pain to fill because the had to constantly be adjusted. I ended up switching to the Enzo bags for two reasons, (1) because they fit in the lockers much better and (2) because of the Johnson pump that I was running. (more on this in a bit) On my boat, with these new bags there is still a small triangular spot on top of the shelf that I have been considering throwing some Pop products bags on for a little extra weight. Right now I just store a couple of fenders on that shelf. Every little bit of weight you get into that back corner seems to help. That is why when some guys go super big, they even throw a little fat brick on the swim step. As for your clam shell bag, I don't think it is super important on the regular side, especially if you are riding with 5-8 people in the boat. 5-8 people,a full Enzo sack and gear will get the job done. What really helps is an adjustable trim tab. Depending on water conditions, that may in fact be too much weight to be safe. I know that I personally don't like to push it in terms of too much weight if the water is even a little bit choppy. People are the best kind of ballast because you can easily place them around the boat and "tune" the wave. When we surf regular, with usually 4 adults in the boat, we don't run any bow weight. For goofy riders we put a 400 lb bag up in the passenger play pen to help get the bow down and lengthen out the wave, however that is really just polishing a turd because the goofy wave on an Enzo is just crumbly and you need a lot more weight to even get close to half the quality of wave that you can get out of the regular side, but this is a whole other topic which pains me greatly because I am a goofy rider. Quickly about the pump and why it lead me to an Enzo bag.... I originally liked the idea of a reversible pump and bought one plumbing it in using the same inlet that the stock pump under the swim step used. After doing the math with a hard tank and the 1100 lb bag, I got pretty close to what an Enzo bag would weigh and was happy enough with that considering (2) Enzo bags were about 1g. I plumbed the pump to the bag then connected the bag to the tank thinking that the water would flow to fill the bag, and then overflow into the tank, then out the vent when full. This worked pretty well, except when draining the bag tank combo, if you were not watching the bag and left the pump on to long, besides the risk of burning the pump up, it would just suck and suck and suck and "raisin" the bag up and then start sucking in the plastic tank. While the tank did not break, I was inspecting it at the end of the season and could see the beginnings of failure due to the vacuum that the pump created. Since I had it all apart I just scrapped the tank and put in Enzo bags. As an added benefit the Enzo bag fit better with the SideSwipe as I mentioned above. I have no idea how long custom bags would take. Someone on here has ordered them... If you do get Enzo bags you can just plum them in using the stock pumps and they would probably fill just as fast. Before you blow a bunch of cash on bags and installation, it might be good to work out where the weight needs to be with people and or bags and then plumb accordingly.
  5. 2006 SV230 Ballast Set Up

    Oh, and I should add that I have an 06 Enzo
  6. 2006 SV230 Ballast Set Up

    Been there, and done that..... and I don't think I would do it again.....but that is based on my experience. If you have the SideSwipe, Enzo bags are great because they fit well with the exhaust covers. If you don't have that option, the 1100lb bags work well in the locker. You will find a lot of extra wasted space unless you go with a custom Enzo bag. As for pumps, if you already have inlet holes in the transom for the stock pumps, I would stick with the aerators. I Installed a Johnson pump that is reversible and wiring it was a PITA because the switch was so far from where the pumps were mounted. I know guys on here wire straight to the switch all day long, but I ended up running another fuse panel with some relays to handle all the amperage. Also you have to constantly watch the level of the bag so you don't run the pump dry and burn it up. For this reason alone, I wish I stayed with the aerators.
  7. Been having trouble with the reliability of my boat starting lately. Turn the key for power on, then when you to start it....nothing. Starter solenoid is is good working condition is boat is not "in gear". After a few wiggles of the stick and a little futzing with the safety lanyard she usually fires right up. Is there a micro-switch in the gear lever that I could look at changing out, or could the safety lanyard connection be failing. Any ideas are welcomed. I hate chasing electrical ghosts.....
  8. Neutral Safety Switch

    Photo. Forgot that little attach to this file button.
  9. Neutral Safety Switch

    That and a new Cable Harness for the NSS are the ONLY parts I have not replaced, only because my local parts house did not have them in stock. 20 hours diagnosing and testing and it may all come down to a relay. Sweet! I will keep you guys posted on the fix. The two fuses are part # 16 in the exploded diagram. BTW. marineengine.com has great exploded assemblies and parts lists. No affiliatiion, just sharing the wealth of knowledge.
  10. Neutral Safety Switch

    Oh, one other thing. Is there a positive and negative side to the NSS? In studying it before installation, I could not see any + or - markings. Since it is a switch I didn't think it mattered, but maybe that is an issue?
  11. Neutral Safety Switch

    Thanks for the suggestion Bigcatpt. I replaced the NSS and no luck. I also replaced the starter and the ignition switch. Still nothing. Is there a micro-switch in the gear shift assembly? It is my understanding that the NSS on the trans is always powered on, but I am thinking there might be a micro switch in the shift assembly that when you put the boat into forward or reverse, it cuts the power to the switch on the trans. Make sense? Otherwise I am at a loss, except one thing that did happen when installing the new starter is that I cranked down a little too hard on the positive stud on the solenoid and heard a little cracking. I am afraid I may have wasted the solenoid so am going to pick another one up today and try switching that out. Sucks so much to have boat trouble during the summer. So few months to really enjoy it here in the NW and it has been out of commission for the last 3 weeks. I have a service appointment for it next week, which was the soonest I could get, but am hoping to get it resolved myself so I can get some use of it this weekend.
  12. Looking at getting an on shore charger, but am unsure on which one to get in regards to the number of amps I need. I have 2 dual purpose group 27's. 6, 12, or 20 amps. I know that bigger is not always better.
  13. I had this same issue last year. You don't need a ground block, you need relays. But since you are reversing polarity on one motor, you need 2 relays per. I will put a wiring drawing together of what I did if you need it. (null)
  14. Rev 10's And HD-750/1

    How many ohms are the speakers running at? (null)
  15. If I remember correctly, H20king had a similar issue that he addressed while doing the Pss shaft seal install. I think it's covered in his write up in the DIY section. (null)
  16. Grab and turn. Righty tighty, Lefty loosey (null)
  17. Pss shaft seal install

    Shaft size is 1-1/8" , but Stern Tube diameter came up when I purchased mine 1 month ago. I work right by PYI and purchased directly from them. I was unsure of the size needed when I purchased, but we determined that the that the part for for the 1-1/2-5/8" and the 1-3/4-78" is the same. They just rubber cement a reducer in to reduce the shaft tube size. I have not installed mine yet as I am waiting for my right surf v-drive, but I know that having the smaller one will work either way.
  18. How picky are you?

    I hate that too. I think I went through about 5 different screen covers until I found the Moshi. Check it out. It is washable, removable and no thicker than any other one on the market. Plus it comes in a nice matte finish. 100% bubble free and a lot more durable/ I bought one for my iPad and the next day went out and got one for my phone. I was skeptical at first, but am sold now. http://store.moshimonde.com/ivisor-ag-ipad.html
  19. With the season right around the corner, (and a nice bump from the Tax man) I am getting ready to put a new stereo in the boat. Attached is what I think is a good wiring diagram, but would like some opinions. First of all, this wiring diagram is trying to accomplish two things: 1. Wire up some more battery power for my new stereo integrating the Blue Sea add-a-battery and (2) add some relays so that my ballast pumps are more reliable. The one thing that I know this diagram is missing is a shore charger. Unfortunately due to the boat storage situation I do not have access to power, however the boat gets used quite frequently. (2 or so times during the week and all weekend during the summer) Also getting out of our wake zone to get to a place to surf takes about 20 minutes. I only mention this because it allows time to charge, however I don't know how effective 1500 rpms is in charging. 1. Right now the stereo is (2) Class D 700 watt amps and a head unit. No EQ or other equipment. One amp powers the Rev 10's, the other does (4) in boats and a sub. I am considering adding a 3rd amp to power (2) additional in boats, so the additional amp will be small, however that will probably happen next year. I drew in the 3 amps to make sure I had enough connector space in my distribution blocks for the future. Right now I do not have any batteries. (I had one Group 24 last season that barely made it to the end) Battery is located under the observer seat with (2) fatty wires running from the engine. I am planning on purchasing (2) or (3) non AGM batteries. I am going with non AGM because I can not keep them properly charged without a shore charger and I figure that for the cost difference, I can just purchase new batteries next year if needed. Stereo will be played will we hang out and lounge for 2-3 hours. I would say at 1/4 volume. Not looking to be "that guy" on the lake. As I mentioned above, our hang out spot is usually a good 20 minutes of WOT away from our wake zone which is another 20 minutes at idle. Plenty of time to charge. Not sure if I even need the 3 batteries, but figured I would draw it in. It would be (2) batteries in parallel for the stereo and other goodies and (1) for starting/helm stuff. The head unit will be wired to a SPST switch using power and ground from the amp. In reading some other forums, I came across this diagram which suggest that wiring the head unit this way is a good way to eliminate any noise in the system. See link for the thread. http://www.wakeworld.com/forum/showthread.php?t=727021 2. The rest of the diagram addresses adding some relays for my ballast pumps. I have two johnson pumps. Basically one for the port and one for the starboard. Last year, with only on battery I was not able to run both pumps at one time. As it was with one pump running, I was barely pulling enough voltage for my Perfect Pass to stay on. I would usually have to put it in neutral and put some RPMs behind it. Even then if I switched on the second pump, the voltage gauge would show a severe hit and the perfect pass would lose power temporarily, and the second pump wouldn't run. On early morning surf runs before work, 2 pumps is a must to get one side filled while the other is emptying. To solve this I was planning on running a 4 or 8 gauge cable from up front (off the Blue Sea Safety Hub 150 http://bluesea.com/viewresource/1446 that is being installed for the stereo) to the smaller Blue Sea Safety Hub 100 http://bluesea.com/productline/overview/416 will be near the motor, close to where my pumps are so I don't have to make such a long run with wires from the pump. The safety hub 100 has (3) lugs. I plan on using one for each of the pumps and the third will be perfect for a shower install later in the summer to keep us surfing on into the winter. Grounds for the relay will go to a buss bar that comes off the negative of the starter. Couple of other questions I had while drawing up this diagram: 1. Is it okay to leave the helm buss hooked up as is? Meaning, I don't need to switch the wiring of that to the stereo side since it will only be running lights, gauges, etc. 2. Should I consider moving my Perfect Pass wiring to the House or Stereo Side? 3. Did I overdo it on the gauge of wire since I have somewhat short runs? Sorry for being so long winded. In doing all this research it seems like there are a million ways to hook this stuff up. Hopefully the attached diagram makes sense. I am totally open to any and all suggestions. Enzo Power Wiring Diagram_v1_03272012.pdf
  20. Thanks To be honest I think the drawing is messy! I am a Technical Designer for a living and spend my days worrying about the .001 of an inch. At night in my free time I tend to get a little sloppy. Once I get this project done I plan on doing a cleaner write up/ diagram for the benefit of the Crew. The information I have found on this site has been very helpful and I would like to be able to give back. (null)
  21. Got it. Have one on order. In regards to the circuit breaker..... How big and where?
  22. It just occurred to me that if I order two volt meters, (one for each bank) then there would be no need for the switch. I could just mount these to the battery box for each bank or in some other convenient location?
  23. Alright, so if I am understanding you correctly you are talking about a switch to control what the Stinger volt Meter is reading? Where and how do you wire this into my current diagram? Also should I include a circuit breaker in the schematic? If so, where and how big? Thanks.
  24. David, Thanks for the response. I am by no means sold on the Add-A-Battery as a solution to my power problems. I am willing to use another solution if one exists based on my lack of ability to use a shore charger. For example, I have read a little about the Hellroaring Isolater which seems to be a lot like the Add-A-Battery, however it doesn't utilize the switch. Would this be a better solution?
  25. Last year when I purchased my boat, a 2006 Centurion Enzo, I had the a perfect pass installed on the far right of the dash where the blank is or was. Well the installer apparently took those 4 hot wires and taped them together and stuffed them back in the dash. Couple of times last year while we were out, I could occasionally smell what I knew was an electrical fire, but thought that it was my switches that I run my ballast pumps through. I was not using a relay and the pumps pulled just about as many amps as the switch was rated to handle. I just assumed that the switches were failing and was planning on addressing it next spring. Well now it is next spring I have been spending some time cleaning up the horrible wire runs from the perfect pass install and in doing so I came across the source of what I am pretty sure is the source of my electrical fire smell. It appears that the wiring wore through the tap or the tape came off and the wire was contacting the metal brackets that holds the gauge into the dash panel. You can be the judge by looking at the attached pictures. Anyways, my question is what do I do with these wires and how do I properly and safely dress them to prevent a future catastrophe?
×

Important Information

By using this site, you agree to our Terms of Use and Privacy Policy..