Search the Community
Showing results for tags 'heater'.
Found 3 results
-
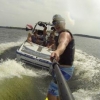
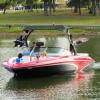
Hi all, thought I'd share my notes on a DIY Heater Craft Install. Their instructions leave a lot to be desired... My Specs: 1 2007 Avalanche 1 Marine Heater - 300 Pro - All Inclusive System [ 3-Outlet ] 1 4-inch Hole Saw 6 Beers random tools 1 Wife that doesn't understand why we need a heater (yet is always cold on the boat) First of all, remove the captains chair and the wife, this makes getting under the dash and around the boat 80 times better. The layout If you plan on something different than this setup, like moving a hot tube further down the port side, you're going to need more heater hose. With this setup and what they sent me, if the hose was 2 inches shorter I would not have had enough. I chose to put the heater up under the dash, because really there was no where else to put it. My amps are on the opposite side in the ski locker, if it wasn't for those, I would have definitely put it there as there would have been a whole lot more room. The air intake from the dash and the hose for the fuel make this very very tight The nice thing is that having it on this side, there is no need to drill holes for the water hoses, you have a straight shot to the walkthrough, then from there across to where the pumps are and on to the engine. Double plus is that all of the water hook-ups are on the starboard side So first thing I did was connect the hoses to the heater and run them to the engine compartment, I figured it would be a massive pain to try and connect these after the heater was installed given my lack of space. On the starboard side, remove the plug on the side of the thermostat, this guy: The thermostat is the guy with the belt diagram on him on my boat. If anything but water comes out when you remove him, put the plug back in and try again. Install a brass barb that came with the heater kit. I used teflon tape, there's no reason not to. Connect one of the hoses, it doesn't matter which one. Now, it's good to note that you may opt to install a ball valve here in case of a failure in the heater system. I did not. The space was a little tight and I was in no mode to fight with it (only 1 beer in at this point). Plus, I threw the removed plug in my tool bag. If there is ever a failure, I'll shut her down, have a beer while she cools and replace the barb with the plug. Test the system, put the unconnected hose over the side of the boat and connect your water source. Water should come out of the hose, if it does not, your barb is in the wrong hole. The kit came with the "Y" fitting for the return. This fitting goes between the hull and the pump of the intake line This was a pretty heavy duty line, it also had a wire looping through the hose. The clamps that Heater Craft included were too small of this hose. I could just barely get them on with the clamp on the last thread, but the "Y" pipe wouldn't fit in because they were too tight. So I had to make an emergency run to the local hardware store to get some that did fit. Install the "Y" pipe so that the smaller "Y" piece points to the side of the hull intake. We're creating a venturi effect here, where the water passing through the hull causes a suction on the smaller pipe, thus pulling the water through the heater. Fluid Dynamics baby!! Run the water again. In my system the flush kit is installed after the filter, so seeing water run through the filter with no leaks means we've got a working system! So that was the easy part, I'd say that took about a beer and a half, maybe 2 beers worth of time. Now install the heater and the hoses. For the fixed louver I decided to put it next to the drink holder. My days as a teen making over-sized subwoofer boxes for my tiny car told me that you DO NOT want to open a hole through a sealed subwoofer box. Even if I sealed it, I wouldn't let myself do it. So I removed the panel and drilled through the backside just enough to get through the plastic, I cut the vinyle with a razor I cut the heater hose to this length and connected it to heater unit now, because I could tell by the look of things it would have been a massive pain to do so after the heater was installed. Time to install the heater. This was the hardest part for me. I'm a giant oaf, it was not easy getting my body turned the right way to get under the dash to get to the screw holes Next I drilled the the center hole that is on the walkthrough. Be very careful not to drill this hole too high (like I did). There is a 1/2inch piece of some alien material under the step, if you go too high you have to cut a piece of it out. Install the hose for this guy You can now put the side panel back on. I cut the hole for the hot tube that goes under the ski locker hatch. I chose to run the hose for this one behind the cooler because a) my hole saw sucked and I didn't want to cut anymore holes 2)it was pretty crowded already with the other two hoses coming up beside the subwoofer. There was just enough hose to go this way, I had to stretch it out pretty tight. Lastly I wired up the switch. I have three blanks on my dash next to the hours meter. So I knocked one of them out and put the switch here. It was a tight fit, but the switch eventually pushed through under my oafish strength. I already had a spot on my fuse box for the heater, with a wire that ran to no where. So I re routed this and put it on a center barb on the switch (doesn't matter which side). I then put the yellow wire (High) on the top and the red wire (Medium) on the bottom. I did not connect the orange low speed, I tested it, it was a pretty useless speed. Then finally I connected the black wire to the fuse box and test the fans to make sure we were all set So project finished! Start up the boat and let her run for a bit and make sure you get hot air! Finish your last beer, clean up your mess, and pat your self on the back! This post has been promoted to an article
-

Hot Tube or Accordian Heater Tube replacement
N8 Froelich posted a topic in Centurion Boat Maintenance, Performance, Troubleshooting
The accordion heater tube on our enzo is torn right at the vent that comes out with the tube. Anyone replaced this part? I'm going to try to repair with some electrical tape because I've really got nothing to loose. The rubber it is made with seems so thin I can't imagine that it won't happen again. Is there a better way, option? Also you really have to jam it in there to get it to fully collapsed, have others noticed this and or do I need to get in there and try to straiten out the receiving tube? Check the threads and didn't see any posts on this, thanks in advance for ideas. -
Engine compartment heater
Bartman posted a topic in Centurion Boat Maintenance, Performance, Troubleshooting
Does anyone have experience with thermostat controlled heaters for keeping the engine compartment above freezing temps. I have been looking at Xtreme and Boatsafe engine compartment heaters as an alternative to winterizing my boat. I live in Texas and my boat is stored on the trailer in a garage, so it doesn't see a lot of extended freezing temps.